Decorative cones - perfect for decoration.
For this we need:
Gouache
Any nail polishes
Fantasy
Cones
Artificial snow or salt
Several brushes
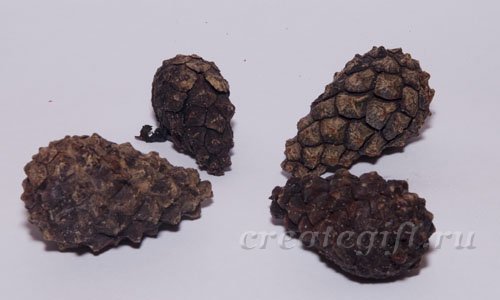 We get the materials ourselves: we go into the forest and with good thoughts we find beautiful, closed cones. After we have collected them, we must cook them (not to eat them for dinner, but to kill all the microbes).
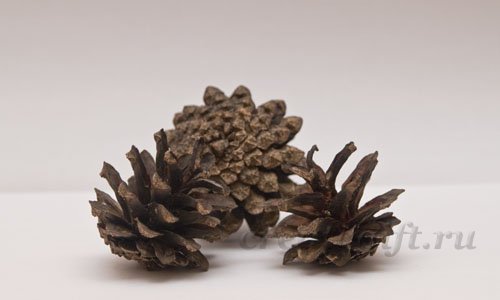
You need to cook for 20-30 minutes, let them cool. You can put them on the battery or come up with other ways to make them dry faster and open beautifully. After drying, they will open up beautifully and finally remind us of the real bud look we always imagine!

![]()
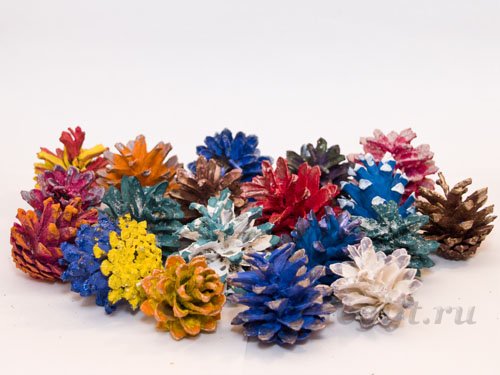
But you don’t need to paint everything at once, but in stages. At the first stage, we paint with paints (one or many colors). If you are painting in several colors, we advise you to pause between paintings to allow the freshly applied paint to absorb and dry. On average, gouache dries completely in 5-10 minutes.

At the second stage, you can already paint with varnishes, glitter and any other “glitters” - it’s a very simple matter and it takes a couple of minutes to paint. Don’t forget to buy dry artificial snow in the store, but if you’re short on money or all the stores are already closed, then replace the snow with salt - the effect is the same!
Interesting usage ideas:
Option 2
 Decorating a pine cone for the New Year
With your own hands you can make a wonderful Christmas tree decoration (or even a small souvenir gift!) for the New Year.
For work we will need: golden or silver paint (acrylic or gouache, or just nail polish with glitter will do), large thin wire, ribbon and shiny rope (although you can paint just a thick thread).
1. Let's choose a suitable cute pine cone.
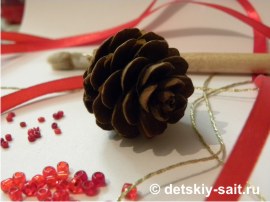
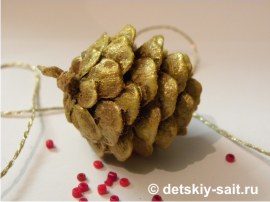
2. Apply paint to the outer surface cones (you can also put them on the inside, but this is optional). I took gold acrylic paint. This is how the golden cone turned out:
3. Now we will need some wire and make a kind of garland out of it (see photo). The garland is made on one wire, and its length depends on the size of the cone (the larger the cone, the longer the garland).


4. Twist the garland around the pine cone.

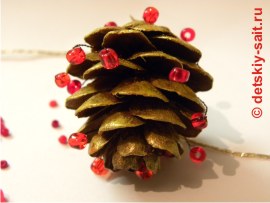
5. We tie a rope (so that there is something to hang it from) and a ribbon (so that it is beautiful).


My cone turned out to be golden and red, but you can make it silver with white or blue, and in general use any combination of colors - there are no limits to your imagination!
Design examples
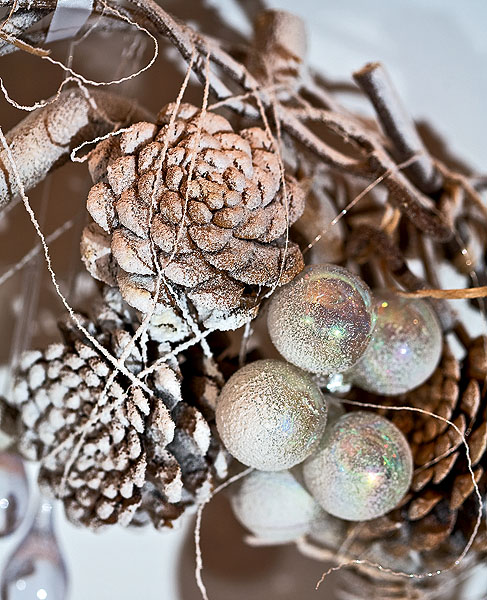
Gilded cones. To paint pine cones gold or silver, you will need a can of spray paint, which can be purchased at any craft store. These pine cones and small Christmas balls in a glass vase make a nice composition for a coffee table or a mirror in the hallway.
Mini Christmas tree. A pine cone can easily turn into a miniature Christmas tree if you “hang” small ball beads made of felt on it (of course, they will have to be placed on glue). Such Christmas trees can be “planted” on festive table, and then give it to friends as a memorable New Year's souvenir.
Figurines. Best idea for New Year's leisure with children: we remember kindergarten skills - turning pine cones, acorns and twigs into dogs, forest creatures and bunnies.
Candlesticks. You can place small pine cones, nuts or acorns in a glass candlestick and place a large candle in the center.
New Year's pendant. No comments.
Basket of cones. A wicker basket filled to the brim with pine cones looks very impressive. And if you decorate it with a glowing Christmas tree garland, the basket will become simply magical!
Gift wrapping. A pine cone can easily replace a festive bow and create a winter mood.
New Year's composition. To create such decorative group you only need your imagination: combine candles, cones, fir and pine branches, New Year's balls and tangerines. So that the composition pleases the eye and lifts the mood. Just be careful with the fire: it is best to place the candles and pine cones on a flat dish.
New Year's picture. We paint the cones in white Using a spray can, glue them to the wreath frame and place them in the frame - the New Year's picture is ready!
Christmas medley. A traditional Christmas composition of pine cones, twigs with berries, cinnamon sticks and oranges studded with cloves (such fragrant balls are called “pomanders”).
Bring a little bit of nature into your home this amazing holiday with our easy-to-make home decorations and tableware.
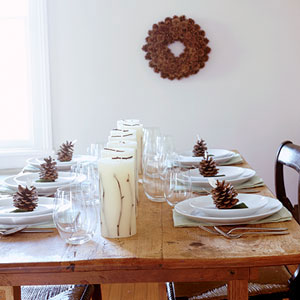
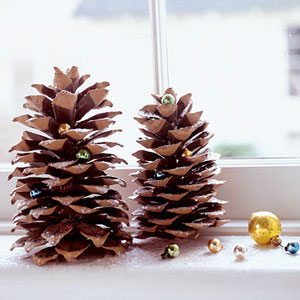 A very simple forest touch - pine cones sprinkled with snow will instantly decorate your windowsill or table.
Take large, tall buds and trim them down to the base so they can stand upright. Lightly sprinkle them with fake snow. Hot glue beads or any small decorations to their feet.
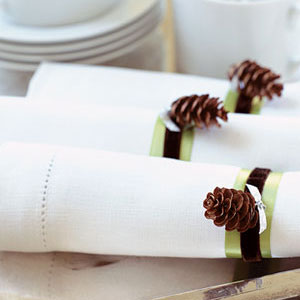 You can very beautifully decorate napkins laid out for guests with pine cones.
Roll the napkins into tubes. First wrap them with a wide satin ribbon, and on top with a velvet ribbon, 2 times narrower. Tie a thin silver ribbon on the small cones, running it along the lower tier of the paws. Tie this ribbon on the velvet one.
 Give an ordinary window an elegant and fairy-tale look with the help of pine cone pendants.
Cut ribbons into random lengths (we alternated organza and taffeta ribbons). Using push pins, secure each pine cone to the end of the ribbon. Glue 3 small ornaments around the tip of the button. Hang the ribbons at the same distance from each other. They can be tied on the eaves or glued with tape or masking tape on the window slope.
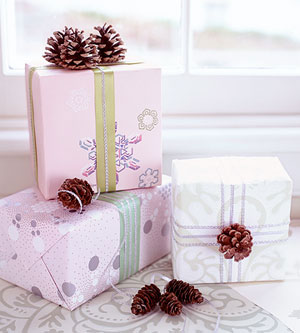 Gifts decorated with forest elements look very New Year's.
After wrapping the gifts in paper, attach beautiful wide ribbons to them using double-sided tape. Using hot glue, glue the pine cones into different places packaging.
 Lovers of romance will love large thick candles decorated with a wreath of pine cones.
Take the cones different sizes and use hot glue to glue them around the base of the candles.
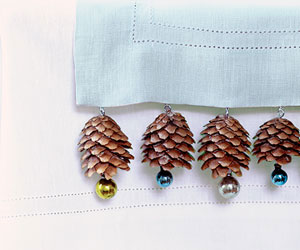
 To make the guests at the table feel the atmosphere of the New Year, make nameplates for each of them. X.
Trim the buds until they are stable. Decorate their paws with beads. Attach nameplates for guests to the pine cones using narrow silver ribbons.
We offer an idea for a charming tablecloth decoration with pine cones for the New Year.
Carefully trim the base of the pine cone and insert a small hook into it with the side where the thread is. Sew the eye of the hook to the hem of the tablecloth. Attach a small round decoration to the tip of the cone using the same hook.

Cones are an ideal material for crafts; they are safe and accessible to everyone. You can create compositions from pine cones together with your child as crafts for the New Year or for an exhibition at school. You can create everything that your imagination allows: all kinds of decorations for room decor, toys for the Christmas tree, animal figurines, a Christmas wreath, topiary. Below are several detailed master classes with photographs on making compositions from fir cones.
Christmas tree for New Year's holidays
It is not always possible to buy a live Christmas tree for home; in this case, an artificial craft made from cones would be an excellent alternative.
For the Christmas tree we need:
- Pine cones;
- Thick paper or thin foam;
- Acrylic paint;
- Glue gun;
- Decorative elements.-
We cut out a cone-shaped base for the Christmas tree from polystyrene foam, or glue it together from thick paper. Using a gun, apply glue to the base of the cone and glue it to the cone. We cover the top of the cones with gold, silver or green paint. Leave the cones until completely dry. We decorate the Christmas tree with small balls, beads, and artificial snow.
Christmas tree toys made from pine cones
The pleasant chores associated with purchasing and decorating a Christmas tree bring a special festive atmosphere to the house. In order for the New Year's beauty to be distinguished by her own style and originality, you can use toys made with your own hands from the gifts of nature. It is worth preparing cones in advance in the fall, since it will be difficult to find them under the snow in winter. Following our master class, you can quickly and easily make toys for the New Year.

We will need:
- Cones of any coniferous trees;
- Acrylic paints in shiny shades;
- Friable shine;
- Ribbons.
We attach a thread to the base of the cone, on which the toy will hang on the tree. Apply paint to the future toy using a brush and sprinkle it with glitter. Leave to hang to dry. To keep the paint on for a long time, the cone can be filled with varnish. We tie the satin ribbons into bows and glue them to the pine cone with a gun. The toy can be additionally decorated with New Year's decor.
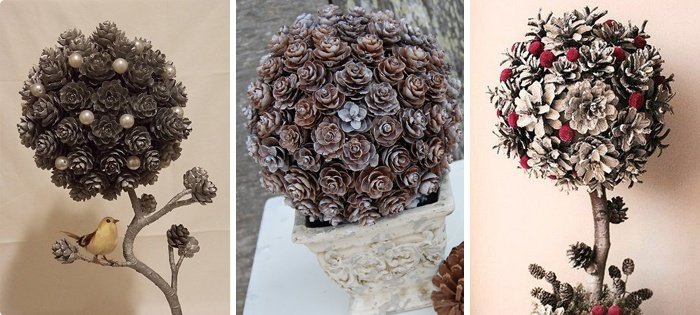
Topiary
A tree made from natural materials, which, in addition to decorating the interior, can bring happiness and prosperity to the house. In addition to cones and acorns, chestnuts, artificial flowers and leaves can be used to make topiary.
To work we will need:
- Spruce and pine cones;
- Small container or vase;
- Paper sheet;
- Straw or bamboo fabric for the container;
- Glue gun;
- Gouache;
- Gypsum;
- A blank in the shape of a foam ball;
- Spray paint;
- Decor elements.
The first step is to prepare a container for the future topiary. To do this, use a gun to cover the vase with a cloth made of bamboo or straw. You can use felt or sesal for floral work. Tie a satin ribbon bow on top. Paint the blank ball with brown gouache. Let's make a hole through the ball and thread several branches through it, which will serve as a trunk for us. Secure the branches in the ball with glue for strength. Apply glue to the base of the cones and glue them one by one to the round blank. Let's cover the pine cones with white spray paint. We place the trunk of branches in our prepared container and fill it with diluted plaster. Let the plaster dry and harden. We decorate the topiary with beads, balls, moss, and ribbons.
Christmas wreath made of pine cones and spruce
The Advent wreath has long become an integral attribute of the New Year. A wreath made from pine cones will cost you minimal money and can last for several years. It is done very simply, so you can involve your child in the process and have a fun and useful time.

We will need creativity:
- Vine branches for the base of the wreath;
- Cones;
- Glue gun;
- Elements.
We twist the vine into a three-dimensional circle and strengthen it with floral wire so that the wreath does not move apart. Glue spruce branches around the perimeter of the wreath, alternating them with pine cones. We attach decor on top: rowan berries, Christmas balls, bows, walnuts, dried orange slices, fruit models. This wreath can be hung on the door, or decorated New Year's table, placing a thick candle in the middle.
Hedgehog made from cones
For development creativity For your child, you can make a fun craft with him in the form of a hedgehog from pine cones and plasticine. It’s easy to make, and the finished toy will delight your children.
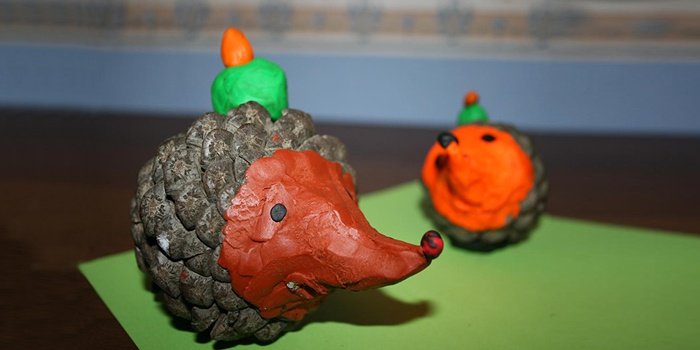
We mold the hedgehog's face from light plasticine and attach it to the base of the pine cone. From plasticine of a darker shade we will make small balls-eyes and a nose. We place small ears on the animal’s head, and the paws below. Let's mold an apple, mushroom or pear from plasticine of the corresponding colors and attach them to the hedgehog's "needles".
Video on topic
A selection of video tutorials on creating compositions from pine cones.
DIY compositions from pine cones. If you managed to walk through the forest on your day off, then you probably brought with you several fragrant prickly cones as a souvenir. But from them you can make beautiful and original New Year’s decorations, toys and compositions. Don't miss this great chance to surprise your friends and family, see how you can use this forest beauty put her to work!
Round dance
“We collect pine cones, sing songs” - we weave a wreath. A great idea is to make a wreath of alder, spruce and pine cones, carefully placing them on a round base (which can be made from branches and twigs twisted together) with strong glue. 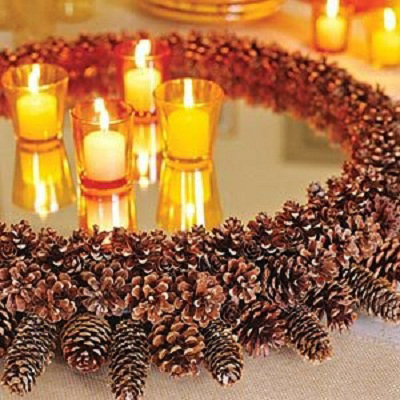
In addition, you can place glass candlesticks in the center of a beautiful wreath.
And if you have a dacha, which is located next to the forest, then you can decorate front door or a gate like this with a wreath of large and small cones collected not far from it. 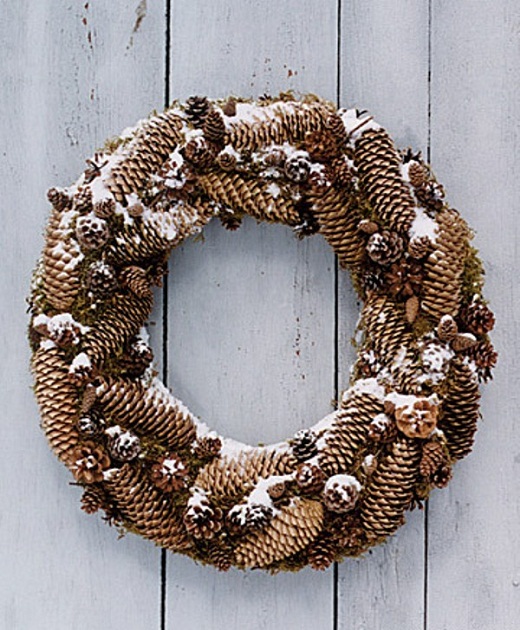 Or just hang it on a beautiful wide ribbon in your home.
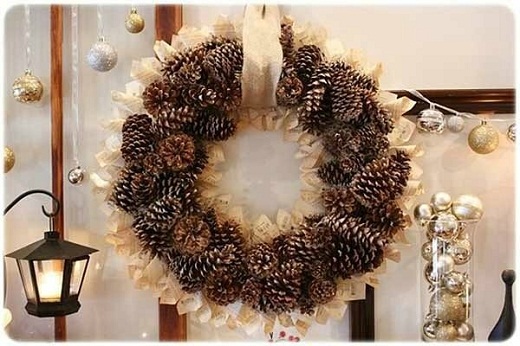
A little mystery
If you have the opportunity to hang the decoration from the ceiling, then you simply need to do this. Loops need to be glued to the cones using strong glue, 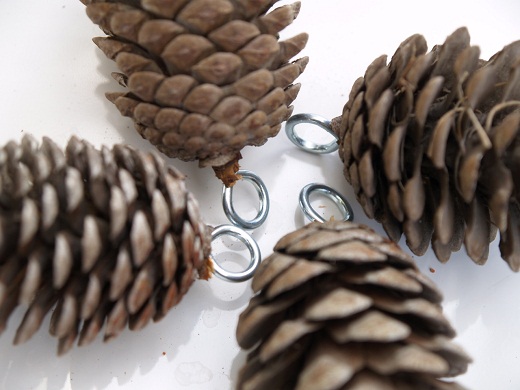 into which you can thread ribbons different lengths and hang them from the chandelier horns. And the round base of the chandelier can be decorated with a garland of white pearl beads. Walking under such a chandelier you will certainly feel the aroma of a coniferous forest.
If you don’t have loops, then instead of them, you can simply insert a regular sewing pin into the base of the cone using pliers, and then you will need to thread thinner ribbons into it.
You can decorate anything in the house with cones on ribbons of different lengths, be it a delicate window in the bedroom 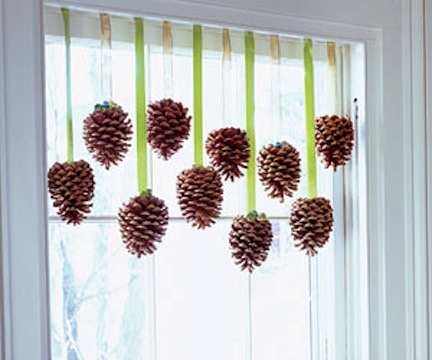 pompous living room window
 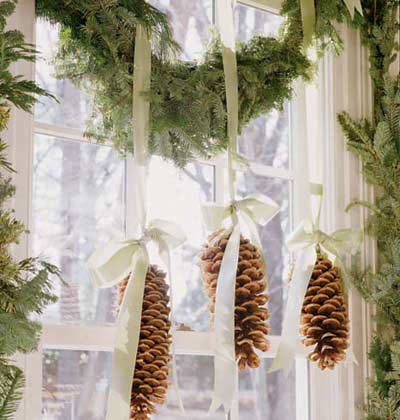 or a bright kitchen window.
Look how elegant the cones look, which serve as fastenings for curtains - a cone, with light touch gilding (to apply it use aerosol paint in cans) 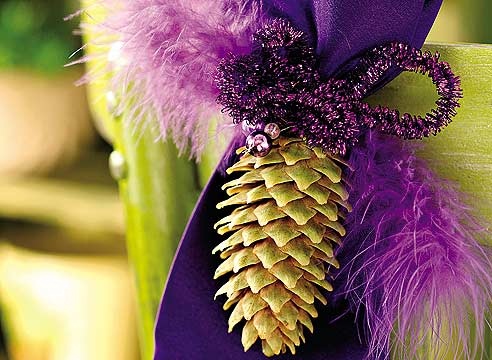
and a couple of cones on a gold cord. 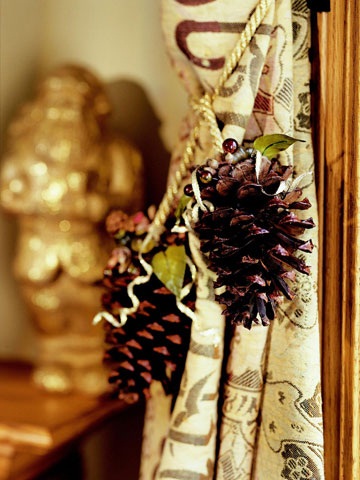
Game of contrasts
If you have a piano in your house, then a garland of pine cones coated with white paint will look especially bright and elegant on it (you can use absolutely any paint to paint the cones). 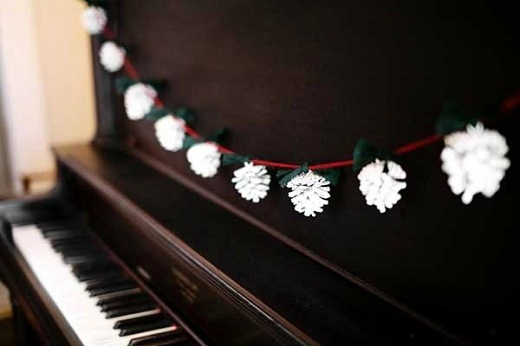 You can decorate any piece of furniture in your apartment with a garland of ordinary pine cones. For example, hang a ribbon holding pine cones under the mantelpiece.
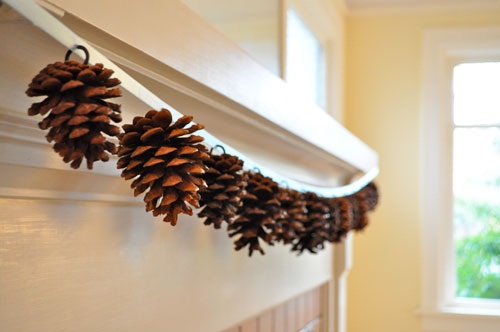
Unusual basket
A flat wicker basket for food can become the basis for such an unusual composition: place pine cones of different sizes along its edges, and place a vase of aromatic fruits, cookies and sweet sherbet in the middle. This dessert can be placed in the center of the New Year or Christmas table. 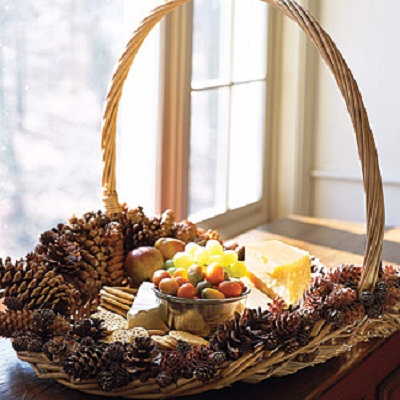
Christmas tree made of pine cones
If you didn’t have time to buy a Christmas tree for the New Year, don’t worry, you can easily build one from pine cones. If you fix a base in the middle of the pot (for example, cut a cone out of polystyrene foam and paint it to match the color of the Christmas tree), to which you can glue cones in rows - place the largest ones at the bottom, and smaller ones approaching the top. And on the very top you can put a fir cone. 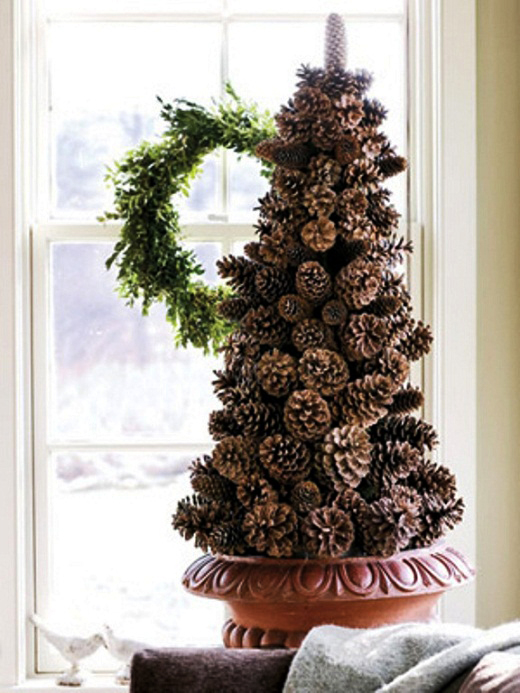
Or make a creative piece from twigs, tying their ends with twine. five-pointed star with bright peppers and pine cones in the middle. 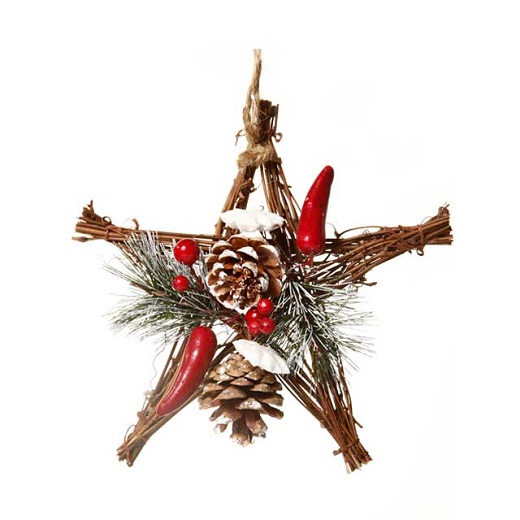
Merry garland
It doesn’t cost anything to make such a cheerful garland yourself - you need to fill the basket inside (with anything - whatever you can find at home), place a Christmas tree garland in it, and cover its wires on top with pine cones. Now, when you turn it on, the illuminated pine cones will sparkle with small multi-colored lights. 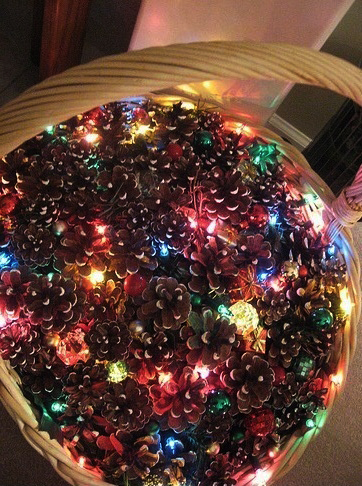
Surprise for children
Have you ever 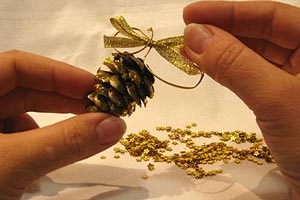 made toys from pine cones, if not, then this is a very exciting activity! All you need is the pine cone itself, a drop of strong glue and, for example, a small bow with a loop for hanging the toy:
That's how elegant they are 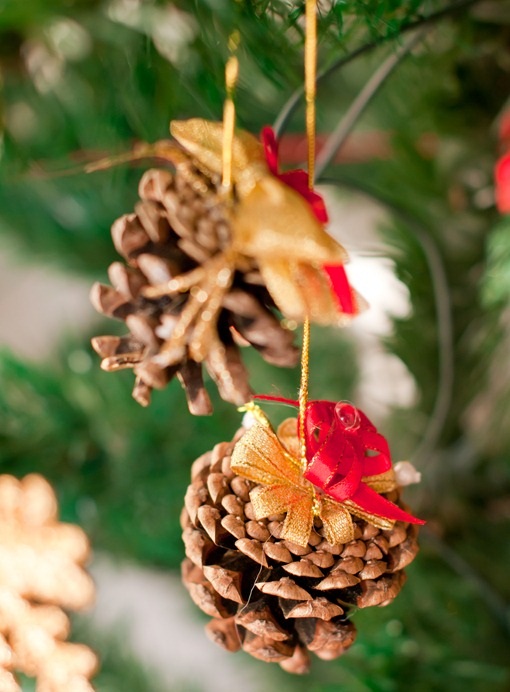
colorful 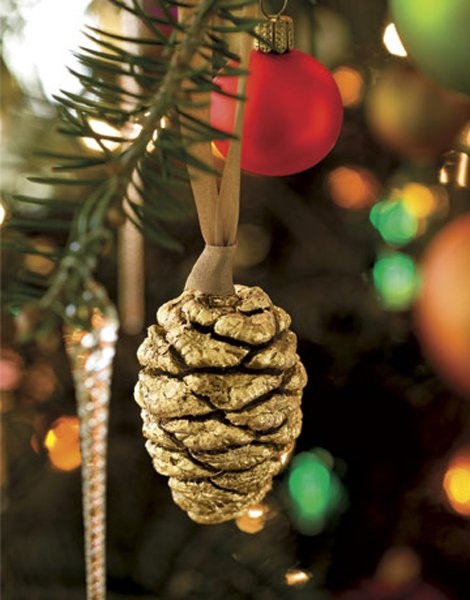
Toys made from forest cones can be wonderful,  if you put a little effort into them!
Decorating flowers
When you're decorating your living room for New Year's, don't forget about the flower pots - look how cute the little pine cones are arranged in them. 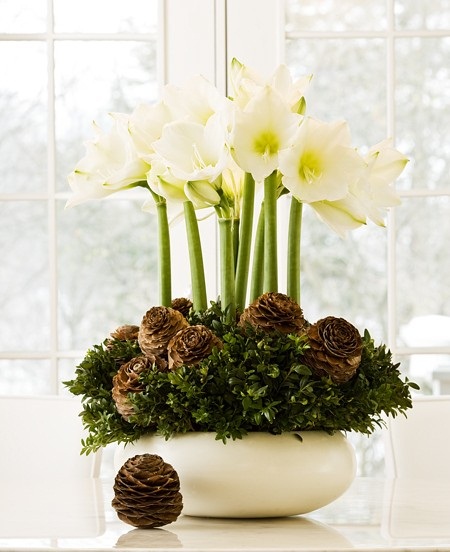
I have an idea!
If you want to easily and quickly build an original candlestick in 5 minutes - nothing could be easier! Take a clean jar, place a thick candle in it and fill the bottom with small pine cones. Incredibly simple and practical! 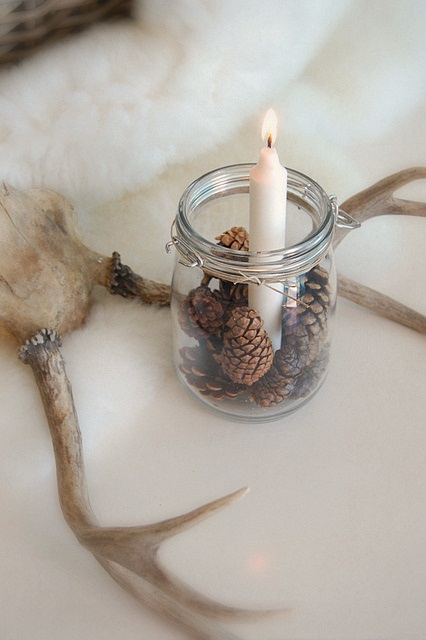
Original
You can use pine cones not only to create decorations in your home, but also to decorate gifts for your friends in no less colorful ways.  Surely they will appreciate your efforts and the originality of such packaging.
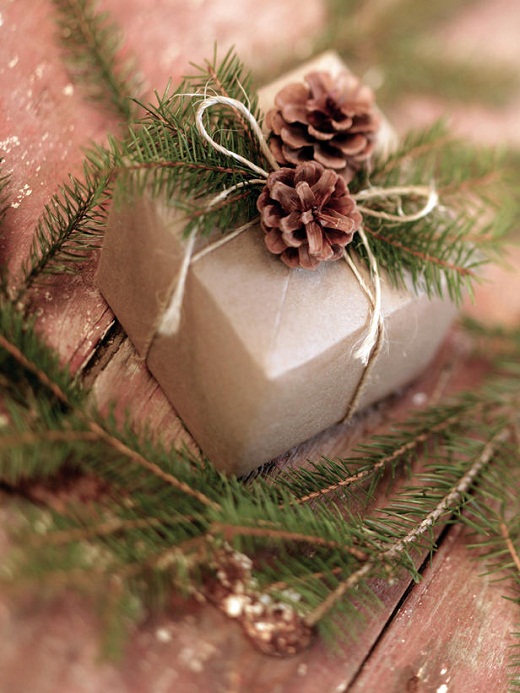
For a dinner party
If you are planning a dinner party with friends, you can decorate the table using small alder cones and sticking them on a napkin ring. 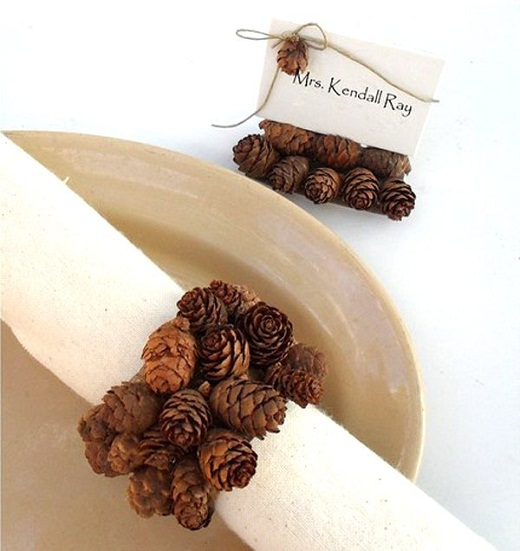 And serve bottles of sparkling champagne wine in a wide vase, adding silver-plated alder cones in addition to ice cubes.
It is not at all necessary to master complex compositions that require a lot of time and effort. Simply place the pine cones next to the frame of a painting on the mantelpiece. With lit candles, they will create an atmosphere of a home holiday, 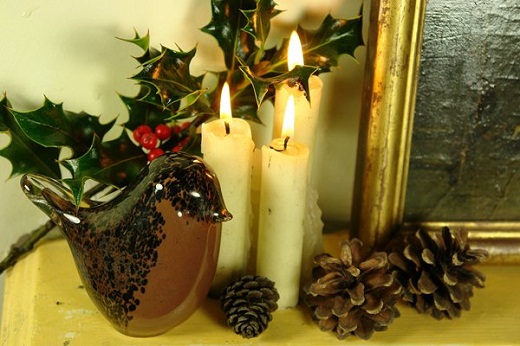 like these colorful pine cones(which can be painted on top with any paint, even manicure polish), placed in a rectangular wooden vase.
or these small pine cones in a round glass vase that make up a festive composition along with clusters of white and silver balls. 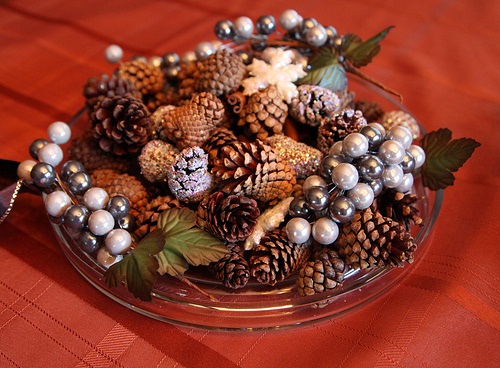
Cones placed on top of firewood logs by the fireplace will bring an atmosphere of warmth and comfort to your home environment.
You can use these ideas for DIY pine cone compositions, proposed by us, or come up with something of your own, giving full rein to your imagination and creativity!
We invite you to watch a video from a professional florist on how to make a Christmas tree arrangement for the New Year from pine branches, juniper, pine cones and... I won’t go into further detail, it’s better, as they say, to see once than to hear a hundred times. Enjoy your viewing!