The invention relates to methods for removing noise in an image and can be used to improve image quality. The technical result is to simplify the removal of noise and improve the quality of the resulting digital image; this is achieved by converting the brightness of the pixels of an image with noise by solving the diffusion equation of a non-divergent form, simultaneous noise suppression and preservation of image edges are ensured. 2 salary f-ly, 1 ill.
Drawings for RF patent 2316816
Field of technology to which the invention relates
The invention relates to methods for removing noise in an image and can be used to improve image quality.
Prior Art
By now known various ways removing noise from the image.
For example, US Pat. No. 6,463,182, Canon Kabushiki Kaisha, 10/08/2002, G06K 9/40 describes an image noise removal apparatus and method in which distorted image data is divided into blocks and noise is corrected depending on the position of each image pixel in the block.
US Pat. No. 5,933,540, General Electric Company, 08/03/1999, G06K 9/00, describes a system and method for reducing noise and improving the edge quality of a digital image by determining the background value of noise in the entire image and removing it using a filter system.
There is a known method for removing random noise (patent US 5225915, Xerox Corporation, 07/06/1993, H04N 1/40) by applying a modified Laplace function to the image data as a filter, which has a maximum at the frequency optimal for noise removal.
The closest to the claimed invention is a method for reducing noise in an image, which involves the use of differential calculations (Later, Catte, Morel et al.). In this method, a noisy image is transformed by a parabolic equation, as a result of which the noise in the image is removed, obtaining a noise-free image. This method was chosen as a prototype of the claimed invention. The disadvantage of the above analogues and the prototype is the instability of the solutions mathematical expression, which describes the noise and blurring of the image as a result of its application. The difference lies in the use of another (simpler) equation, which does not have these disadvantages and is easier to solve.
The essence of the invention
The objective of the claimed invention is to create a method for removing noise on the edges of a multidimensional image, which makes it possible to simplify the method of removing noise, improve the quality of the resulting image at the edges, namely, maintain the shape of the edges without blurring them.
The problem was solved by creating a method for removing noise from an image, which includes stages in which:
A multidimensional image with edges, consisting of pixels and having noise, is received from an external device;
Determine the brightness of pixels for coordinates in the coordinate module ![]() all pixels of a multidimensional image, where n is the number of dimensions;
all pixels of a multidimensional image, where n is the number of dimensions;
An array of pixel brightness data of the multidimensional image is written into memory;
Produced in a filter for all pixels of a multidimensional image following operations:
The dependence of the brightness of image pixels is specified by a two-dimensional diffusion equation of a non-divergent form of the form
![]() , (1)
, (1)
where is the relaxation parameter, is a function of the pixel coordinates of the multidimensional space and the relaxation parameter, k is the diffusion coefficient,  , where is the smoothing parameter of the final image near the edges, and the larger the value of this parameter m, the weaker the smoothing of the final image without noise near the edges, - the parameter for smoothing the final image without noise in areas where there are no edges, the larger the value of this parameter, the weaker the smoothing of the final image without noise in areas where there are no edges;
Numerically solve the n-dimensional diffusion equation (1) with the initial condition ![]() , finding a solution for the value of the relaxation parameter that determines general degree smoothing the final image without noise, the larger this value, the more the image is smoothed, and the set of pixel coordinates of the final image without noise is obtained;
, finding a solution for the value of the relaxation parameter that determines general degree smoothing the final image without noise, the larger this value, the more the image is smoothed, and the set of pixel coordinates of the final image without noise is obtained;
Record the pixel brightness of the final image without noise into memory;
Output the final image without noise to the display device.
For the method to function, it is essential that the external device be made in the form of a stereo vision camera, scanner, digital camera or other similar devices.
For the method to function, it is desirable that a multidimensional image with edges having noise in the form of a normal distribution be received from an external device.
The technical result of the claimed invention is to simplify the method for removing noise and improving the quality of the resulting image by converting the brightness of the pixels of an image with noise by solving the specified diffusion equation, which ensures simultaneous noise suppression and edge preservation.
For a better understanding of the present invention, it is described below. detailed description with corresponding drawings.
A block diagram of a system for implementing the claimed method according to the invention is shown in the drawing.
The system for implementing the claimed method includes an external device 1, a computing device 2 and a display device 3, wherein the computing device 2 contains a memory 4, a brightness determination module 5 and a filter 6.
Let us consider in more detail the operation according to the claimed method.
First, a multidimensional image with edges having noise is obtained from an external device 1. The brightness of the pixels of the multidimensional image is determined in module 5, where ![]() And n- number of measurements. An array of pixel brightness data of the multidimensional image is written into memory 4.
And n- number of measurements. An array of pixel brightness data of the multidimensional image is written into memory 4.
The following operations are performed in filter 6 for all pixels of the multidimensional image:
set the dependence of the brightness of the pixels of a multidimensional image using a diffusion equation of the form
![]() ,
,
where is an unknown function, t- relaxation parameter (its meaning will be described below), x- image pixel coordinates in n-dimensional space. For two-dimensional images, the dimension of space (in this case we can consider ![]() ), for special types of images the dimension may be larger. The equation also includes
), for special types of images the dimension may be larger. The equation also includes 
 In the solution under consideration, it is proposed to use the diffusion coefficient in the form
  Where . The parameter value (as well as the value m) affects the degree of image smoothing.
The main way to use the diffusion equation is to treat the original image as the initial data for the said equation at . ![]()
Considering the evolution of the solution with increasing parameter values t, obtain different smoothed versions of the original image. Thus, another implicit parameter of filter 6 is the final value of the relaxation parameter, T. The result of filter 6 is ![]()
Note that since the diffusion coefficient is a nonlinear function, the result of filter 6 is a nonlinear transformation of the original image. This makes the filtering process image dependent. Different images are smoothed differently. This makes it somewhat difficult to universally assess the quality of anti-aliasing.
To solve the above diffusion equation, use the diffusion coefficient of the form  The parameter is related to the scale of the image brightness representation and affects the nature of the image smoothing in areas where there are no edges. With small values of the parameter, smoothing will be stronger than with large values. The value of this parameter is usually taken as . Parameter m affects the smoothing of the image in the vicinity of the edges; the higher the value of this parameter, the weaker the smoothing near the edges will be. Usually it is enough to use the value or . The parameter affects the overall smoothing of the image. Increasing this parameter increases the overall smoothing of the original image. It is most convenient to take the condition as boundary conditions at the edges of the image.
The original image is sampled onto a multidimensional grid, resulting in an image brightness matrix.
Solve the n-dimensional diffusion equation numerically. To solve this equation, an implicit difference scheme with splitting is used using the fractional step method. The solution to the equation for is obtained by solving the difference equation described below. One full cycle of solving a multidimensional difference equation corresponds to calculating a solution for the value based on the values of the solution for the value of the relaxation parameter. The numerical scheme allows a rough estimate of the solution for any value in one step, for more accurate calculations It is recommended to take several steps with lower values.
The input data for one calculation step is the image brightness matrix at the parameter value. At the output we get the brightness values at
As a preliminary step, we calculate the matrix of diffusion coefficients How alternative option It is possible to directly calculate the coefficient using this formula at the place of direct use.
To reduce the solution of a multidimensional difference equation to a sequence of one-dimensional equations, it is proposed to use splitting using the method of fractional steps. Here n- dimension of the image (space).
One step per parameter t for the original multidimensional equation it is proposed to replace it with n successive elementary steps along individual dimensions, where at each elementary step a one-dimensional equation of the form is solved
As the initial values for the very first substep, take the initial brightness value at: ![]() Calculation result after n substeps is the desired brightness value at
Calculation result after n substeps is the desired brightness value at
Elementary steps for a parameter t choose equal, for example,  where is the spatial sampling rate for the mesh (you can also enter this parameter to calculate the diffusion coefficient). Meaning
can be specified by the expression
where is the spatial sampling rate for the mesh (you can also enter this parameter to calculate the diffusion coefficient). Meaning
can be specified by the expression
Let us show how the resulting one-dimensional problems are solved. The resulting elementary problems are one-dimensional, because All variable indices except are fixed. Therefore, when considering one such problem, we discard constant indices.
Each elementary problem is divided into independent tridiagonal systems linear equations relatively having the form where for the case under consideration ![]()
![]()
![]()
![]() and the boundary conditions have the form
and the boundary conditions have the form ![]() Where r- number of grid nodes (image size in pixels along a given dimension). To solve the specified system of linear equations, the sweep method is used: first, a direct substitution step is performed: the specified equations are converted to the form (step coefficients are calculated, the right boundary condition is used, and
Where r- number of grid nodes (image size in pixels along a given dimension). To solve the specified system of linear equations, the sweep method is used: first, a direct substitution step is performed: the specified equations are converted to the form (step coefficients are calculated, the right boundary condition is used, and
As a result, the final image without noise is output to display device 3.
Although the above embodiment has been set forth for the purpose of illustrating the present invention, it will be clear to those skilled in the art that various modifications, additions and substitutions are possible without departing from the scope and spirit of the present invention as disclosed in the appended claims.
FORMULA OF THE INVENTION
1. A method for removing noise from an image includes the steps of obtaining a multi-dimensional image with edges consisting of pixels and having noise from an external device; the brightness of the pixels u 0 (x) is determined in the coordinate module for coordinates x=(x 1 , ..., x n) of all pixels of the multidimensional image, where n is the number of dimensions; recording an array of pixel brightness data of the multidimensional image into memory; perform the following operations in the filter for all pixels of a multidimensional image: set the dependence of the brightness of image pixels using a two-dimensional diffusion equation of a non-divergent form of the form
where t is the relaxation parameter;
u=u(x,t) - function of pixel coordinates of multidimensional space and relaxation parameter;
k - diffusion coefficient,
 ,
,
where m>2 is the smoothing parameter of the final image near the edges, and the larger the value of this parameter m, the weaker the smoothing of the final image without noise near the edges;
M is the smoothing parameter of the final image without noise in areas where there are no edges; the larger the value of this parameter, the weaker the smoothing of the final image without noise in areas where there are no edges;
numerically solve the n-dimensional diffusion equation (1) with the initial condition u(x,0)=u 0 (x), finding a solution at the value of the relaxation parameter t=T, which determines the overall degree of smoothing of the final image without noise, the greater this value , the more the image is smoothed, and the set of pixel coordinates of the final image without noise is obtained; recording the brightness of the pixels of the final image without noise into memory; output the final image without noise to the display device.
2. The method according to claim 1, characterized in that the external device is made in the form of a stereo vision camera, scanner, digital camera or other similar devices.
3. The method according to claim 1, characterized in that a multidimensional image with edges having noise in the form of a normal distribution is received from an external device.
Good day everyone! We continue to slowly fill the section! In this article I want to tell and show you one of the fastest and easiest ways how to remove noise in Photoshop. In order to explore this topic in more depth and detail, I specially selected an image in which I will show how to remove brightness noise and color noise from an image.
In general, there is a whole lot of noise, unpleasant problem digital photographs taken in dark time days and now we are solving this problem. First, let's open our image with noise and evaluate the situation as a whole.
Go to the menu File/Open or use hotkeys CTRL+O. By the way, you can also open an image using the “ Open as...» ( ALT+SHIFT+CTRL+O), find and select our image with noise, then to the right of the “File name” field, select open as “Camera Raw” file type and our image immediately opens in the Camera Raw filter.
I open my image first, in the usual way, to further show how to go to the special “Camera Raw” filter, select the desired tab and perform noise removal operations. Now let's evaluate my image, which contains color and luminance noise. Here it is:

Image with color and luminance noise
There is more than enough noise in this image. You've probably already begun to doubt that we'll succeed... Of course, we won't be able to completely remove all the noise, but it's easy to make the image less noisy. Let's move from theory to practice!
Step #1
So, I opened my image in Photoshop, now I need to go to a special filter - “Camera Raw filter”. To do this I go to the top menu Filter/Camera Raw Filter, or use hotkeys ( SHIFT+CTRL+A).

Go to the Filter menu/Filter Camera Raw...
Step #2
The Adobe Camera Raw filter window opens in front of us. Place a checkmark at the top in the “Control view” item to immediately see changes in the image while working in the filter. Next, select the “Detailing” tab, I have this third icon on the left. In the lower left corner you can change the image scale, we will need this soon.

Adobe Camera Raw Filter Window
Step #3
Find the “Color” slider and slowly move it to the right until the color dots disappear. Don't try to remove luminance noise at this stage, for now we are only removing color noise (color dots). As soon as the color dots disappear, immediately stop moving the slider.

Zoomed the image up to 300%
Here's what we got on this step after simple manipulations with the “Color” slider. Notice that the colored dots (color noise) have completely disappeared from the image. Now all that remains is to remove the brightness noise.

Color noise in the form color dots completely removed
Step #4
Now let's move on to removing luminance noise. In order to do this, find the “Luminity” slider and slowly move it to the right side, while simultaneously observing our image. When it is enough, we determine it individually in each case, but the “Luminance” value in any case is always higher than the “Chromaticity” value. Here's what happened:

This is the picture we got, the noise has almost completely disappeared
Step #5
As a result of all our manipulations, the sharpness of the image decreased. In order to increase sharpness, you need to move the “Effect” or “Brightness Details” sliders to the right. You can move these two sliders or any one of them.
But keep in mind that you need to move the sliders very carefully, because it turns out reverse effect, the more you add sharpness, the more noise appears. At the end, do not forget to click the “Ok” button to save all changes.

Carefully add sharpness
Now let's look at the result of all our work to remove noise from the image. As a result, we received an image with virtually no noise, the result is quite decent. I think now you will no longer have a question about how to remove noise in Photoshop.

This is what happened after noise removal processing
If you liked this lesson and find it useful, then right now share the link to this lesson with your friends on social networks, do a good deed and let other people benefit from this material too! Social buttons networks are located below.
That's all for today, thank you for your attention, see you in the next lessons!
August 20, 2009 at 10:21 pmCleaning an image from noise, some methods
- Gil Algorithms Blog
If you have seen the picture that is obtained in modern digital cameras without processing, then you know that it looks simply terrible. It's filled with noise. Even when you download a picture to your computer and it has already undergone internal processing in the camera, if you enlarge it and look at individual pixels, you can see how courageously digital algorithms fight noise and lose in this unequal war.
Some algorithms completely erase small details; Nokia cell phones are famous for this. In some cases, the details remain, but they are surrounded by complex colored islands, as can be seen in Sony cameras. And so on - each method has its own problems.
What means are there to remove this noise, and which do not violate other people's patents? I hope this short review is helpful.
1. Transition to brightness-color coordinates.
This conversion can be done in many ways: HSV, L*a*b, etc. For some reasons that we won't go into:
- human eye much less sensitive to details of color information than luminance information
- noise in the color component, on the contrary, is much higher than in the brightness component
Therefore, simple filtering of the color component + reverse restoration usually makes the picture much better.
2. Median filter.
good in a simple way To clear the picture from noise, use the median filter Im_new(x,y)=median(dx=-1..1,dy=-1..1)Im(x+dx,y+dy).
This method has many variations, here are just a few:
2.1 Step 1: calculate M1=median(C, Cnorth, Csouth); M2=median(C, Ceast, Cwest); M3=median(C, Cne, Csw); M4=median(C, Cnw, Csw); here Cnort, Cne,...Cnw are eight neighboring pixels from a 3x3 neighborhood, C is the central pixel
Step 2 - calculate Ma=median(C, M1, M2); Mb=median(C, M3, M4);
Step 3 - calculate Csmooth=median(C, Ma, Mb);
Step 4 - replace C with Csmooth.
2.2 Step 1: sort the pixels from the 3x3 neighborhood in ascending order, P...P.
Step 2: If the central pixel is equal to P - replace it with P, if the central pixel is equal to P - replace it with P, in other cases leave it unchanged.
This direction is used by Kodak, as well as most scanners and fax machines.
3. Filters that control the amount of correction
This method first suggests smoothing the image somehow roughly, for example using a low-pass filter, bilateral filter or something else. And then this procedure is done
Im_new(x,y)=Im(x,y)+S(Im(x,y)-Im_smooth(x,y),threshold).
The transmitter function S can be structured in different ways, for example like this:
S(x,threshold) = x if -threshold
4.Bilateral filter
A very interesting filter, invented in 2003. I refer you to the Internet for descriptions.
Here's a pretty good article: scien.stanford.edu/class/psych221/projects/06/imagescaling/bilati.html
An interesting variety of bilateral filter is also T-filter:
Step 1: Find all pixels in the neighborhood whose values differ from the original pixel by no more than a given threshold.
Step 2: Average these found pixels and save the value.
5. Filters using the spectral representation of the signal
This is how Photoshop works, for example. The idea is to perform a Fourier transform in the vicinity of each pixel, then erase the high frequencies and do the inverse transform.
Instead of the Fourier transform, other orthogonal bases are also used, sometimes quite intricate ones. In fact, this is a whole family of methods.
6. Filters highlighting the dominant direction
These filters at each point first find the dominant direction (the direction of the brightness gradient) and then average the signal only in the perpendicular direction. This way, lines and fine details remain clear. Good variations of this algorithm also take into account the values of the second derivative matrix.
This is a whole family of algorithms, descriptions of which can also be found on the Internet.
7. Local classification of fragments
These filters work especially well with special images such as text, starry skies, etc.
First, a database of typical elements of such an image is compiled, for example, several hundred fragments of NxN pixels that have already been cleared of noise.
The algorithm works like this: the neighborhood of each pixel is compared with these fragments and the one that is most similar is selected. Then the value of the original pixel in the dirty image is replaced by the value of a similar pixel located in the same place in the clean fragment.
8. At the end I will give a “simple” method that can also be used in a number of cases.
Step 1: Make the image smaller (using some clever Downscaling algorithm)
Step 2: Scale it back up (using some clever Upscaling algorithm)
The fact is that Upscaling/Downscaling algorithms can be very powerful (Lanczos filter, fractal methods, etc.), so the result is quite satisfactory. The same method can be used as a simple but quite effective compression.
In the first part of this lesson, we looked at the reasons for the appearance of noise in photography, its components, and what to do to avoid provoking their appearance. In this tutorial we will learn how to reduce noise in Photoshop, Capture One, Digital Photo Professional And Lightroom. All of these programs have a tool for reducing noise in photography, called in photographers' jargon " noise reduction».
- At this stage it is necessary to understand that:
- If during shooting there are only two alternatives: to take a frame without noise (low sensitivity of the camera matrix) but blurred, or with noise but sharp, then I choose the second option. Because you can’t get rid of blurriness, but you can still fight noise.
- It is not always necessary to completely remove noise in a photograph; often it is enough to just reduce its level to an acceptable level.
- Luminance and chromatic noise are removed differently.
- At 100% scale of the image on the monitor, we see noise several times larger in area than it will be on a print, in a printed publication or online photo album.
This tutorial contains large photos that are automatically scaled if your screen size is smaller than necessary. When this happens, a button to zoom in to 100% will appear in the upper right corner of the photo. Only this scale will allow you to accurately assess the strength and size of noise. To view those parts of the illustration that are hidden, drag the image with the mouse over its central part. To close the photo and return to the article, press the Esc key.

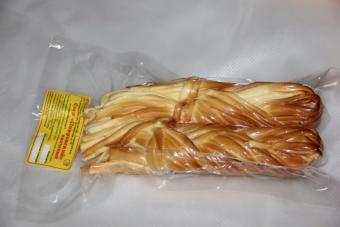
Initial conditions: All noise reduction in my camera is turned off, filming is carried out in RAW format, the sensitivity is set to 3200 units (I still allow this value in my shooting) and 6400 units (let's see if I can use this sensitivity in an emergency). For control, a frame was shot at a matrix sensitivity of 100 units. Exposure compensation of +0.5 stops was made for all images. This slightly increased the noise level in the photographs, but exposure errors occur during shooting, so this correction is closer to the practical situation for the photographer. Test images were cut out ( photo 1): a) a fragment from Shnyr’s food packaging (to control text sharpness and color distortion); b) a scale with fields of different lightness (control of the strength of noise in different tones); c) a fragment of the body of the mythical creature Gava (for greater beauty). On photo 2 we see that with increasing sensitivity, noise spots grow on all target fields, which is quite natural and expected.
Photo 1: test photo.
Photo 2: increasing the sensitivity of the camera matrix leads to increased noise.
Photo 3: Reducing luminance noise reduces the sharpness of fine details in the photo.
How to remove noise in Photoshop.
Ah, pranksters, didn’t you shoot in RAW format or forgot to remove noise at the stage of converting the RAW file? This also happens. Open our photo in Photoshop, then go to the menu: Filter > Noise > Reduce Noise... (Filter > Noise > Reduce Noise...). Here is our first tested noise reduction.
Luminosity noise. It is the first two sliders (Strength and Preserve Details) that are responsible for reducing it. If we drag Strength to the right edge, we will see that the luminance noise is reduced, but the text also becomes blurrier ( photo 3). The main evil of brightness noise: fighting it leads to a decrease in the sharpness and detail of the photo. The attentive reader will notice that the Preserve Details slider is designed precisely to ensure that the image does not lose quality. Move the second slider further to the right and you'll see the sharpness and detail return. But the noise comes back with it, so it turns out that they have exchanged the flaw for soap. Settings I used for ISO 3200: Strength – 9, Preserve Details 6%. If your photo does not have small details, such as text, texture, then Preserve Details can be reduced down to 0. For ISO 6400, these settings turned out to be weak, so I increased Strength to 10, and Details was reduced to 3%, somewhat to the detriment of text sharpness ( photo 5).
Chromatic (colored) noise seems like the lesser evil. By moving the Reduce Color Noise slider to the maximum value ( photo 4) text sharpness is not reduced, color noise almost disappears, but small objects lose color saturation (look at the red and blue fields). Also note that a colored halo is formed around the red dies. Sometimes, such a change in the color of small details can be critical and impossible to photograph. Therefore, we should try to apply noise reduction to a minimum extent: for ISO 3200 I used the Reduce Color Noise value of 70%, and for ISO 6400 - 100%.
On photos 5 and 6 you see the result of noise reduction work in Photoshop. If for ISO 3200, after noise reduction, noise manifests itself at a tolerable level and there is still some reserve for greater suppression, then for ISO 6400 they are already excessive for some shooting, and I would try in every possible way to avoid using this sensor sensitivity.
Photo 4: Reducing color noise can lead to decreased color saturation of details and color ghosting.
Photo 5: reduced noise in Photoshop, ISO 3200.
Photo 6: the result of applying Photoshop noise reduction for ISO 6400.
Conclusions: Reducing luminance noise is impossible without reducing the sharpness of the photo. The use of noise reduction makes it possible to use a sensitivity of 3200 units, but a sensitivity of 6400 may not be suitable for increased requirements for photographic quality. If you take photographs for the Internet or small prints, then I can use a sensitivity of 6400 units. By reducing brightness noise in photography, we do not get rid of chromatic noise, and vice versa.
Reducing chromatic noise in photography can sometimes go unnoticed by the viewer. But if when shooting, color accuracy in small details is important, then excessive use of noise reduction settings in Photoshop is unacceptable, for example when subject photography or in food photography. The more “gentle” the noise reduction settings we use (not only in Photoshop, but in general), the better quality our image is after processing.
Digital Photo Professional
The second one for this lesson I chose Canon Digital Photo Professional(hereinafter referred to as DPP). This is a very simple RAW file converter for Canon cameras and it is with its help that I introduce students of the photography course for beginners to the capabilities of the RAW format. In order to get to the DPP noise reduction, you need to select the NR/Lens/AOL tab on the Tool Palette. Naturally, we are interested in the Noise reduction block, which contains only two sliders: Luminance... - for reducing brightness noise, and Chrominance... - for chromatic ( photo 7). As with Photoshop's noise reduction, I tried to apply the same settings in DPP to maintain a balance of quality for small details and smooth surfaces. For ISO 3200 the following parameters were used: Luminance - 7, Chrominance - 12 ( photo 8). For ISO 6400 - 12 and 20 respectively ( photo 9). The result is very similar to the one obtained in Photoshop's noise reduction.
Setting up noise reduction in DPP. I noticed that when my camera's noise reduction is turned off, DPP applies its own noise reduction to RAW files. It is not convenient to turn off photo noise reduction every time, so you need to make sure that DPP does not apply it by default. To do this, go to the DPP settings (Ctrl + K keys), go to the Tool palette tab, turn on the Set as defaults switch, set all sliders to 0, click OK, and restart DPP ( photo 10).
Photo 7: Canon Digital Photo Professional noise reduction.
Photo 8: the result of applying DPP noise reduction for ISO 3200.
Photo 9: the result of applying the same noise reduction for ISO 6400.
Photo 10: DPP noise reduction settings.
Capture One
Today Capture One is my main RAW file converter. As with DPP, its noise reduction ( photo 11) is not disabled, and is applied to the RAW file regardless of camera settings. Moreover, even when there is no need to reduce noise, for example, with low sensitivity. I did a little research on the noise reduction algorithm in Capture One, and it interested me so much that I decided to read the help of this RAW converter. Alas, none useful information I couldn’t find any information on how noise reduction works in Capture One. Therefore, the results of my conjectures, assumptions and research will be described below.
According to the Capture One help, the noise reduction of this converter changes its settings after analyzing the file. I admit, over several years of working in Capture One, I have adjusted its noise reduction settings only a few times. The noise reduction works so gently, intelligently, unobtrusively and excellently in automatic mode that I simply forgot about its existence.
The first thing I checked was how my photography would improve when I removed the noise reduction settings for ISO 100. And nothing happened. That is, if there is no noise, then the noise reduction does not work. Then I noticed that increasing the sensitivity only changed the Color value (the effect on color noise), but not the Luminance value (brightness noise). Then I assumed that with the same Luminance value and with increasing sensitivity, luminance noise would increase in proportion to what happens in the absence of noise reduction. Not so. The noise increased, but not so significantly. I won’t guess how this happens, but I was pleased with the result of Capture One’s intelligence.
In the following experiment, I tried to find the minimum value of the noise reduction settings that would satisfy me, and compare how much softer my settings were with the default settings offered by Capture One. The changes were so minor that they can be ignored: for ISO 3200 Capture One suggested values of 25 and 54 (Luminance and Color), but I found softer values acceptable: 20 and 50, respectively. For ISO 6400, Capture One's own noise reduction settings completely satisfied me, and I did not touch them (25 and 57).
There are a few more amenities that can make noise cancellation even more effective. Surface allows you to reduce noise spots large size on low-contrast, smooth surfaces without interfering with small details such as text (value 70 for ISO 3200 and 90 for ISO 6400). Single Pixel allows you to remove single-pixel noise (individual knocked-out pixels) without losing fine details. True, such pixels appear only at ISO 6400 or when the matrix overheats in Live View mode. Despite the fact that the noise reduction test used a matrix sensitivity of 6400 units, I did not use this Capture one setting, since the impact of the main tools was sufficient.
I'm very pleased with the quality and noise reduction capabilities of Capture One. Unlike the noise reduction devices discussed above, Capture One does not create color halos or reduce color saturation in small details of the photo. Colored noise in shadowed areas is also suppressed significantly better than previous competitors. This speaks of high quality algorithm for reducing color noise. Surface's action also makes luminance noise appear weaker, especially on plain surfaces.
You can see the results of noise reduction in Capture One at photos 12 and 13. However, it remains to test a competitor among RAW converters - noise reduction in Lightroom.
Photo 11: Capture One noise reduction.
Photo 12: the result of using Capture One noise reduction for ISO 3200.
Photo 13: the result of applying the same noise reduction for ISO 6400.
Lightroom and Adobe Camera RAW
I even downloaded the new Lightroom - 4.3... In all previous versions of Lightroom, its noise reduction, according to users, was considered a weak link and was not recommended for use. Those. After converting the RAW files into Lightroom, noise reduction had to be done in Photoshop. But Photoshop’s noise reduction system is much inferior in quality to at least Capture One, and I can’t recommend this chain (Lightroom > Photoshop) for noise reduction. I have come across a mention on the forums that Lightroom noise reduction has been improved, starting with the fourth version. Wanting to clarify this information with experienced users, I again found myself on the Lightroom forums. And what I read there did not please me at all: slowdowns, difficulties in operation, glitches, in general, everything is as always with the RAW file converter from Adobe. This finally turned me away from installing Lightroom, and instead of its noise reduction, I will test a similar Photoshop tool - Adobe Camera RAW. I have long noticed that the settings of these two Adobe products are identical, and lead to the same results after processing RAW files. That is, the operating algorithms of both programs are the same (it would be strange for one manufacturer to make two versions of noise reduction). If I'm wrong and you have good reasons for this, please let me know.
In order to reduce noise in Adobe Camera RAW, you need to go to the Detail tab. This noise reduction has more settings than the noise reduction in Photoshop (photo 14). By default, for files of both sensitivities, Camera RAW does not suggest reducing luminance noise, but reducing color noise (Luminance – 0, Color – 25, Color Detail – 50). At these settings, color noise is suppressed beautifully, and (as in Capture One) I don't notice any color ghosting. Wonderful. The Color Detail slider helps adjust (return) color saturation for small details (remember, this was a problem in Photoshop's noise reduction). I left the Color Detail value as default, i.e. 50. But I lowered the main Color setting to 15 (for ISO 3200) and 20 (ISO 6400).
Highlight spots on smooth surfaces remained visible but unobtrusive at Luminance settings of 55 (at ISO 3200) and 70 (ISO 6400), but did result in a slight reduction in text detail. Therefore, I chose a compromise Luminance Detail value of 40 (for ISO 3200) and 50 (ISO 6400).
I really liked how Adobe Camera RAW reduces noise ( photos 15 and 16) that I thought about the permissibility of wider use of sensitivity 6400 on my camera. If we added the Surface setting to this noise reduction as in Capture One, then it would have no equal. I wonder how the places will be distributed among the noise reduction leaders at the end of this photography lesson.
Photo 14: Adobe Camera RAW noise reduction (the settings are identical to Lightroom).
Photo 15: the result of applying Adobe Camera RAW noise reduction for ISO 3200.
Photo 16: the result of applying the same noise reduction for ISO 6400.
Noise reduction test results
Noise reduction test results in photos 17 and 18: the worst are at the top, the best are at the bottom. When shooting at high sensitivities, I do not recommend using Photoshop noise reduction for raster images and Canon Digital Photo Professional. The main reason is strong color halos around colored parts in a photograph. It is also difficult to find a compromise in these noise cancelers between the level of brightness noise on smooth surfaces and the sharpness of small details. Capture One, compared to the first two, looks in an advantageous position until the Adobe Camera RAW noise reduction comes into play. The latter showed that in many cases I could use the 6400 sensitivity for commercial shoots too: amazing luminance noise reduction for smooth surfaces while preserving fine detail, and a good job of reducing color noise. I don’t understand what people who work in Lightroom are complaining about?
Photo 17: Comparison table of noise reduction for ISO 3200.
Photo 18: Comparison table of noise reduction for ISO 6400.
Photo 19: Charming noise.
Conclusion
If you want to use high sensitivity values when shooting, then start fighting noise at the shooting stage - shoot in RAW format. Do not transfer the process of noise reduction to Photoshop; do it in a RAW converter when correcting photos. Use the converter that will reduce noise in photography with less losses (and losses are inevitable). Use the minimum noise reduction settings.
If the photo has loud noises, then in some cases you can limit yourself to reducing only the color spots. The remaining luminance noise will be very similar to film grain. Sometimes this grain imitation is even preferable to the smooth image of a digital camera. For example, if you are stylizing a photograph as antique. In other cases, grain can give a certain charm to a photo ( photo 19). It’s not for nothing that there are Photoshop filters that create similar film grain. But, this is a topic for another lesson.
PS: This noise reduction test did not use the latest versions of Adobe Camera RAW and Capture One. Therefore, it is possible that the noise reduction algorithms in these programs have become even more advanced.
PPS: Don't make noise!
Noises can be random analogue, pulsed and various types of deterministic.
Random analog noise
Random analog noise is generated, as a rule, by the granular structure of the photographic material in which the original was made. Noises become relevant at magnifications greater than 8x.
To eliminate such noise, smoothing filtering methods are used.
The action of these methods is based on digital filtering by averaging the signal value over the vicinity of the read pixel. In programs like PhotoShop, these anti-aliasing filters are called Blur, Gaussian Blur.
Blur will give direct averaging. Gaussian Blur introduces pixel weights into the averaging matrix according to Gaussian law.
Blur is obsolete because it does not allow you to adjust the degree of averaging. The degree of smoothing is adjusted by repeated application of the filter.
Gaussian Blur is more modern. In it you can adjust the averaging parameter, thus adjusting the smoothing.
It must be remembered that the use of such filters can lead to loss of image sharpness, since not only the noise structure is averaged, but also the pixels that form the image boundary. In some cases, it is advisable to additionally carry out an unsharp masking procedure after the smoothing procedure.
Random impulse noise
Random impulse noise refers to relatively sparsely located single defects, such as scratches and dust particles. When applied to them, the smoothing procedure is usually not effective due to the fact that the size of such defects is quite large.
To eliminate such defects, rank-ordinal class filters are used. Such rank-order filters create a series of pixels along a line, arrange these series by placing them in ascending order, reject the minimum and maximum values pixels that may be defective and find the average value in this series. This average value is put in place of the analyzed pixels.
In this way, relatively minor defects such as scratches and dust can be eliminated. In principle, it is possible to change the length of the series and thus select for larger defects.
However, for fairly large defects that exceed the length of the pixel series, this method is not applicable.
This is the method used by the Dust and Scratches filter.
For larger impulse noise, it is necessary to resort to semi-automatic retouching, in which image defects are eliminated by replacing defective pixels with colored pixels from their immediate surroundings. A pixel is selected from the immediate surroundings and placed on the defective location.
In software, this procedure is called a stamp and requires a significant investment of time. Before proceeding with such a procedure, it is necessary to analyze the image at a magnification scale during reproduction and eliminate those defects that will be noticeable at this scale. In principle, the same procedure can be used for editorial correction, when it is necessary to supplement some lost details of the image.
Deterministic Image Noise
Most prominent representative deterministic image noise is the raster structure of the image if a printing print is used as the original.
Reading a raster image may result in unwanted interaction of the image's raster structure with the new raster structure generated during the photo output process.
There are two possible ways to solve this problem:
1. elimination of the raster structure of the original during scanning and processing. Methods used for this similar methods aperture filtering when reading images with a larger aperture, or their digital analogue, that is, averaging pixels and generating an averaged signal.
It has been shown theoretically and experimentally that best results are obtained by matching the size of the aperture with the dimensions of the raster element of the raster structure of the original. Therefore, during the scanning process, it is necessary to accurately determine the raster lineature that was used in the original and select the derasterization filter in accordance with this lineature.
To determine the raster lineature in the original, it is possible to use special tests. Some modern programs, for example LinoColor, allow you to determine the lineature during the preliminary scanning process and set the optimal derastration filter in accordance with it.
Disadvantages of this elimination:
1) loss of image sharpness;
2) due to different angles of rotation of the raster image structures for different paints, complete coordination of the derastration aperture and the raster structure does not occur and residual fluctuations in the image (moiré formation) are inevitable.
2. reading the raster structure with its complete preservation. As a result, when reading three raster color-separated images, we will obtain the raster structure being preserved. In fact, we will receive an image in the SMUK system. This image can then be transferred to Lab, thus losing information about the raster structure. Then transfer all processing to Lab and go to SMUK with its raster structure.
To do this, it is necessary to read at high resolution. СopiDot – corresponding software to transfer SMUK to Lab.
The current difficulty is that reading color images has significant difficulties. Therefore, this kind of CopiDot technology is currently used to read rasterized and color-separated photoforms.
Particularly interesting is this technology, which lately has developed greatly, with the need to use some archival photo frames C-t-P technologies(computer-printed form).
3. Rerastering using a raster of irregular structure (frequency modulated).
We recommend reading
 Fusel oils in moonshine and other alcoholic beverages: influence, benefits, harm and purification
 Functional projections of zodiac signs What can be said about vector projection signs
 Degas E. “Blue Dancers. Essay based on the painting by Edgar Degas “Blue Dancers Dancers in Blue”
 We reflect in the RSV reimbursement of social insurance expenses for the last year Appendix 2 line 090 of the calculation of insurance premiums