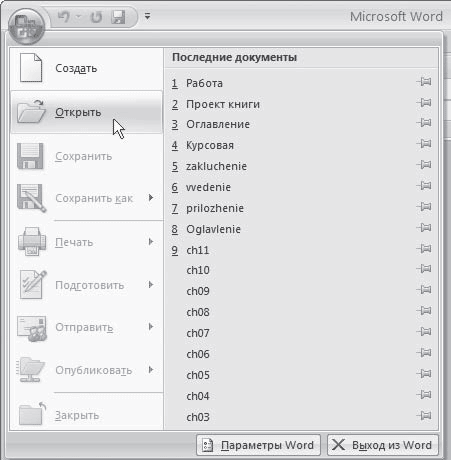
Although Word automatically creates a blank document when you open it, sometimes you need to create documents manually. Creating a document is one of the simplest operations in Word. To create a new document, you need to click on the Office button and select the New command from its menu (Fig. 2.2) or press the key combination Ctrl+N.
Rice. 2.2. Run New Office Button Menu
When you press the keyboard shortcut, the document will be created automatically based on the Normal template. This template is the base template for most documents and is a blank document that is used as the basis for a new document. In this case, all the contents of the template are transferred to the created file, and the template itself remains unchanged.
When you execute the New command from the Office button menu, the Create Document window opens (Fig. 2.3).

Rice. 2.3. Window Create Document
In this window you can select a template based on which the document will be created. The most common type used to create simple documents is New document. In this case, the document is created based on the Normal template.
Note
Templates can make it easier to work on documents of a certain type: letters, faxes, resumes, reports, etc. Read more about working with templates in section. 4.8.
To create a new document, you need to select a template in this window and click the Create button.
Opening a document
During the work process, the user often has to not only create documents, but also make changes to existing ones. To do this, you must open the document in one of the following ways.
Opening a document from outside WordIt is not necessary to open documents in the program itself. If the document was created in a format that is associated with Word, there are many ways to open it. The fact that the document can be opened in Microsoft Word, indicates icon
located next to the file name.
A Word document outside the program window can be opened in several ways: by double-clicking on its name in the folder window; by right-clicking on the file name and selecting the Open line in the context menu (see Fig. 1.15); by executing the Start > Documents command (if you have recently worked with the document).
When you open a file using one of the above methods, Microsoft Word will launch and the selected document will be opened in it. If the application has already been launched, an additional window will open. If the program was launched, but there were no documents open in it, the file will open in the same window.
Open a document in WordAdvice
If you often work with a document, you can add a shortcut to it on your Desktop so you can quickly open the file when you need it. How to do this is written in section. 1.2.
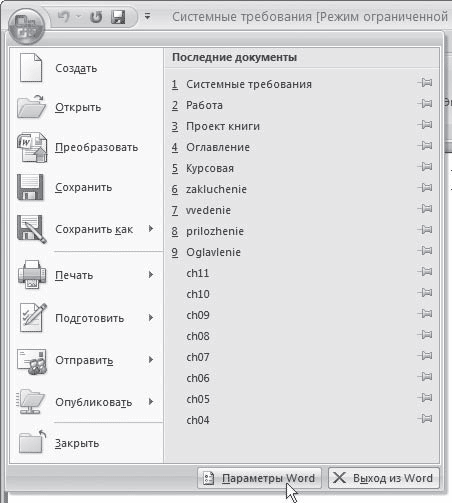
Often when working with a Word document, you need to open another document. To open a document in the program, you need to execute the Open Office button menu command (Fig. 2.4) or press the key combination Ctrl+O.
Rice. 2.4. Execute Open Office Button Menu
Whatever method you use, a document opening window will appear (Fig. 2.5).
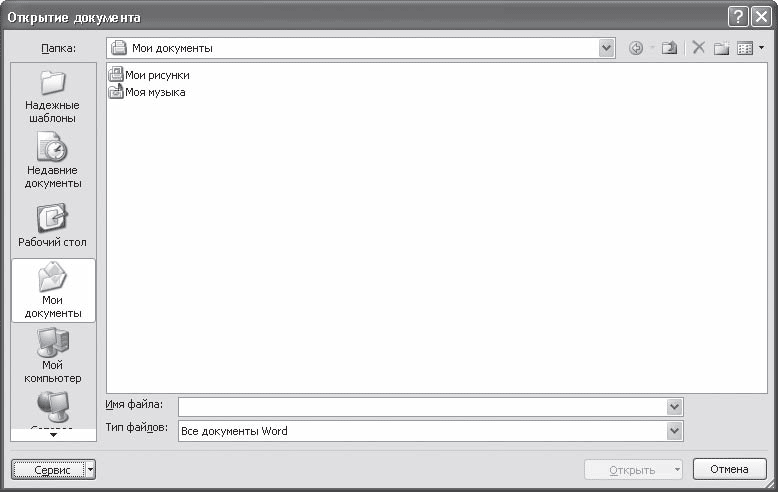
Rice. 2.5. Window Open Document
To open a file using this window, do the following.
1. Select the drive where the file is located.
2. Select the folder where the file is stored.
3. Double-click on the file name or select it and click Open.
By default, the Open Document window displays the contents of the My Documents folder. If you open a document from some other folder, the program will remember it and the next time you call the Open Document window, it will show its contents. However, if you close Microsoft Word and open the Open Document window during your next session, the application will display the contents of the My Documents folder again.
If you save most of your documents in a folder other than My Documents, you can change the default directory displayed. This will save you quite a lot of time, since you will get rid of the need to go to the desired folder every time to open a document.
To change the default folder in the Open Document window, do the following:
1. Click on the Office button and click the button in the menu that appears Word Options(Fig. 2.6).
Rice. 2.6. Word Options button on the Office menu
2. In the Word Options window that appears, go to the Saving section (Fig. 2.7).

Rice. 2.7. Settings for saving Word documents
3. The Default File Location line shows full path to the folder that opens by default when the open and save document windows appear. To change this folder, click the Browse button to the right of this line.
4. The Change Location window will appear, in which you should select the desired folder.
5. After specifying the folder, click OK twice to close the folder selection and Word settings windows.
On the left side of the Open Document window there are shortcuts to the folders from which documents are opened most often. This is the so-called address bar, which contains links to the following folders:
Reliable templates – Word document templates;
Recent documents – documents that the user has recently worked with;
Desktop – files placed on the Desktop;
My Documents – documents located in the My Documents folder;
My Computer - allows you to open documents from any of the available hard, floppy and CD drives;
Network Neighborhood – allows you to open documents stored on computers local network or on the Internet.
To get to the listed folders in the opening window, you can simply click on their icons in the address bar.
If you work with other folders, you can open the desired directory using the Folder drop-down list (Fig. 2.8) or using the navigation buttons located to the right of the Folder list. Button with a folder image
allows you to move to a higher level, a button with a left arrow icon
– return to the directory you were in before. If you click on the triangle next to this button, you can select one of the last nine folders you went to (Fig. 2.9).
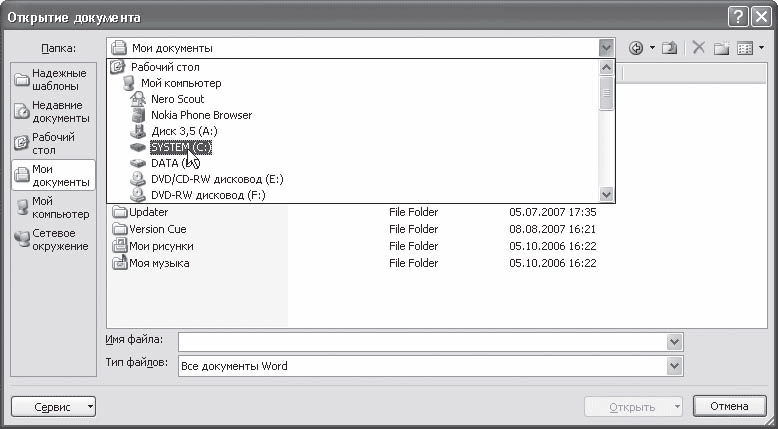
Rice. 2.8. Folder selection list in the Open Document window
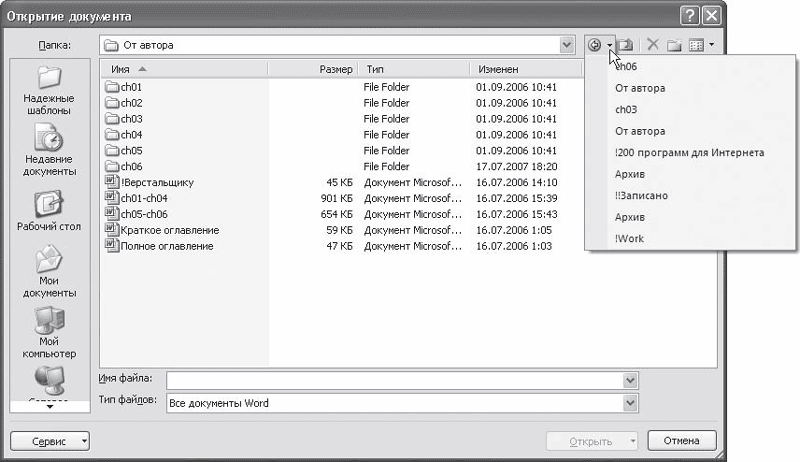
Rice. 2.9. Folder shortcut list on the jump button
To avoid having to navigate to frequently used directories each time using the folder list or navigation buttons, you can add them to the address bar on the left side of the Open Document window. You can also add a drive or network share shortcut to this list.
To add a shortcut to a folder you frequently use in the location bar, follow these steps:
1. Right-click on the address bar and select the Small icons line in the context menu (Fig. 2.10). You will see that folder shortcuts take up much less space. You can add your own folders to the freed area.
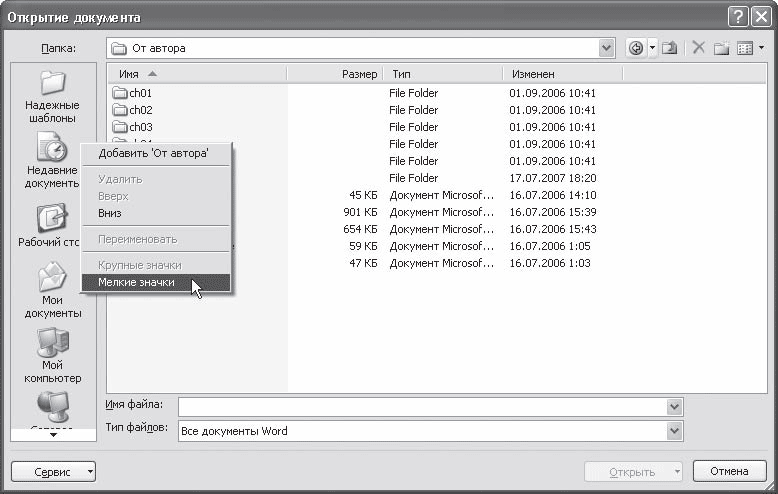
Rice. 2.10. Selecting the Small Icons command from the context menu
2. Navigate to the folder you want to add to the list.
3. Right-click on the address bar and select the Add “folder_name” line (Fig. 2.11). The shortcut will appear on the panel (Fig. 2.12).
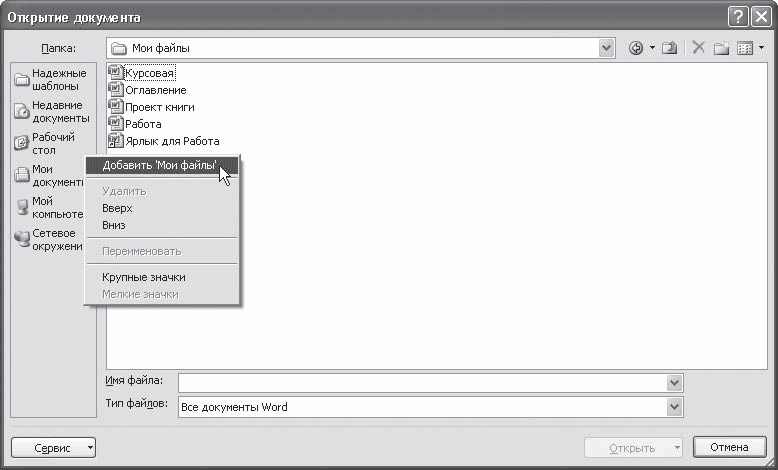
Rice. 2.11. Add a new shortcut to the location bar

Rice. 2.12. Address bar after adding a folder
To delete, rename a shortcut, move it up or down, right-click on it and select the desired command.
Note
The changes you make to the Open Document window will also affect the Save Document window (see below).
If the folder with the desired document contains many files, then to facilitate the search you can use the File name line. Enter the document title or part of it. As a result, in the File name line will appear full name a document located in this folder whose name matches the entered characters.
You can make sure that only files are displayed in the opening window the right type. To do this, use the File type list (Fig. 2.13). If you select the desired format, then all files with a different extension will not be displayed.

Rice. 2.13. File type list in the Open Document window
After the folder with the desired document is selected, to open it you need to double-click on its name. Another way is to highlight and use the Open button. Pay attention to the arrow next to this button. By clicking on it, you can select an option to open a document from a list, including the following (Fig. 2.14):
Open – opens the document in normal mode;
Open for reading – changes cannot be made to a document opened in this way;
Open as copy – opens a copy existing document so that the original document is not changed;
Open and Repair – allows you to restore a damaged file.
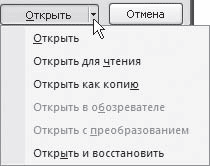
Rice. 2.14. List of file opening options
Opening frequently used files
The latest files you worked with can be opened using the Office Button menu list (see Figure 1.30).
By default, this list can store up to 17 recent file names. This number can be increased to 50. In this case, you will be able to open almost all working documents with one click of the mouse button, rather than using the Open Document window.
To increase the number of files Word remembers, do the following:
2. In the Word Options window that appears, switch to the Advanced section.
3. Using the scroll bar, move to the Screen area. In the Number of documents in the list of recent files list, specify required quantity files in the range from 0 to 50 (Fig. 2.15).
Rice. 2.15. Parameter that specifies the number of files that the program remembers
4. Press the OK button to confirm your selection.
5. Open and close several different files one at a time. Make sure Word remembers all the files you open by looking at the Recent Documents list on the Office Button menu.
When the specified number of files in the list is reached, the names of files that were worked with later begin to displace the names of files that were opened earlier. However, you can pin the file name to this list. To do this, click on the button
which is located to the right of the file name. As a result, the button will change its appearance to
and the file will be pinned to the list.
If you don't want anyone to see what files you're working with, you can disable the program from remembering the last files you opened. To do this, just set the Number of documents in the list of recent files parameter to 0. In this case, Word will not remember the names of the files that are opened.
Saving a document
When working in Word, it is very important to save documents constantly. Typing and editing text is half the battle; the main thing is to save your work. Until the document is saved, all the information that you see on the screen is in the computer's memory and disappears after closing the program. To be able to use it later, you need to write the data to a file and save it on your hard drive.

Saving a new documentNote
Saving your work every few minutes using a keyboard shortcut is a very good habit. Unfortunately, not all computers have uninterruptible power supplies installed, and voltage surges or short-term power outages are not uncommon. As a result, the work may be irretrievably lost. So save as often as possible, otherwise you risk losing your job.
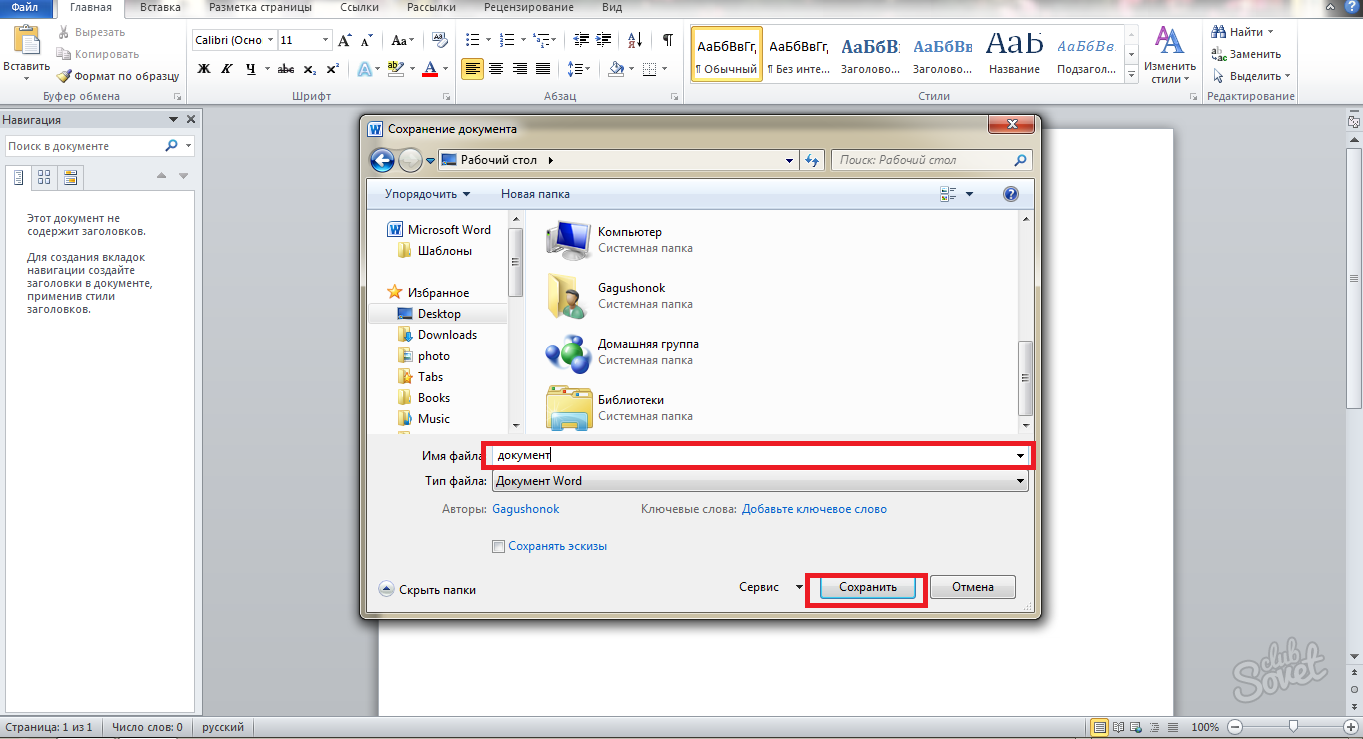
When you save a document for the first time, you need to specify its name, select the folder in which it will be stored on disk, and also set the file format. All required parameters are indicated in the Save Document dialog box (Fig. 2.17), which appears when one of the above commands is executed.
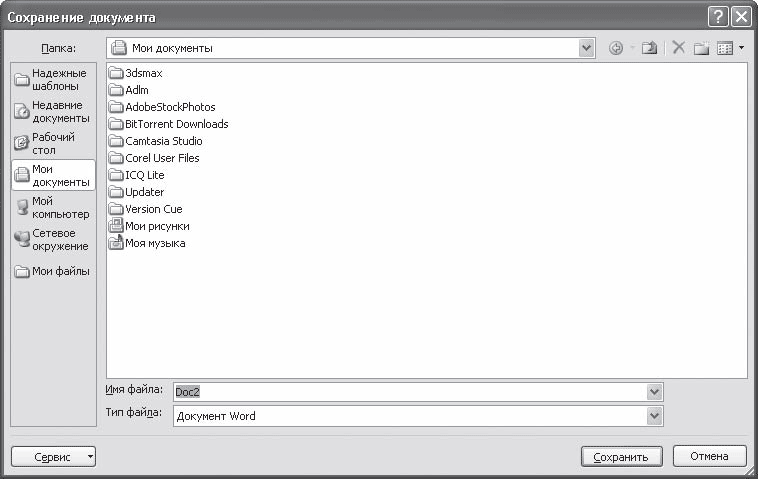
Rice. 2.17. The Save Document window
This window resembles the Open Document window: on the left there is an address bar containing links to folders that are most often used to save documents, at the top there is a list of drives and folders, as well as navigation buttons, at the bottom there is a File name field and a File type list.
To save a document, do the following.
1. Using the location bar or folder jump list, select the folder where you want to save the document. You can also create a new folder using the Create folder button (Fig. 2.18).
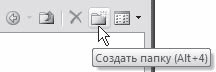
Rice. 2.18. Toolbar of the Save Document window
2. Enter a file name in the appropriate field. By default, the program will name the file Doc1 (the sequence number may be different).
3. Select a file type.
Attention!
Word 2007 uses new format files – DOCX. It is installed by default. Files of this type cannot be opened in previous versions of the application. For compatibility with previous versions of Word, choose to save in the DOC format. This format in the File type list corresponds to the line Word Document 97–2003.
If you usually save files not in the DOCX format, but in some other format (for example, in DOC or RTF), then selecting the desired format from the File type list each time is inconvenient. You can simplify the saving process by changing the default file type used for saving. For example, it is very useful to set files to be saved by default in the DOC format, which is used in previous versions of Word.
To change the default file type for saving, do the following:
1. Click on the Office button and in the menu that opens, click the Word Options button (see Figure 2.6).
2. Go to the Saving tab.
3. In the Save files in the following format list in the Save Document area, select the desired format (Fig. 2.19).
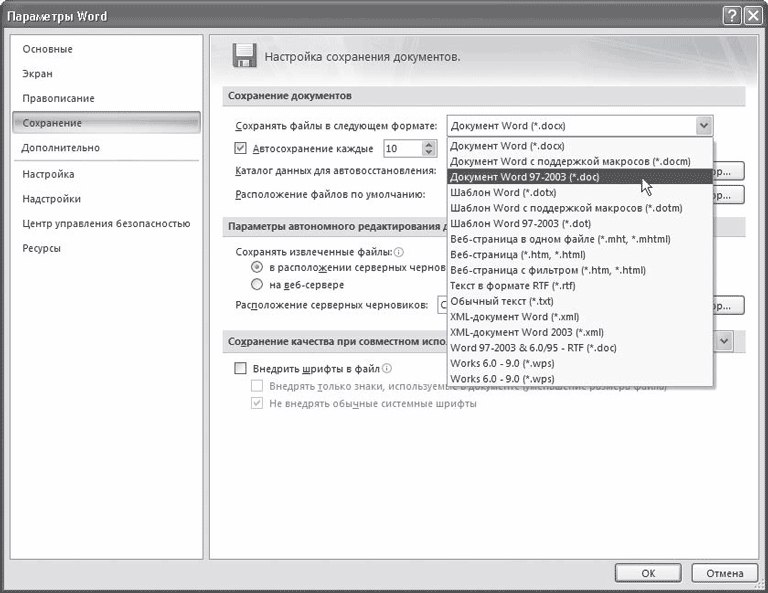
Rice. 2.19. Set the file extension in which Word saves documents by default
Using the Save As command
If you need to save changes you've made to a document while keeping the original file, you can use the Save As command on the Office Button menu. This command contains a submenu that opens when you hover over the command (Figure 2.20).

This feature can also be useful if you want to save a DOCX file in the format of previous versions of Word (to do this, select the Word Document 97–2003 line from this menu). Using the Save As submenu, you can also save the current document as a template, select other formats to save, and open Help for information about enabling support for PDF and XPS formats.
When you select any command of the Save As submenu, except for the Find add-ons for other file formats item (when selected, a help window opens), the Save Document dialog box discussed above will appear, in which you will need to specify the name of the document, and also select the folder in which it will be saved. stored on disk. In the File Type line, the file format is automatically selected depending on what command you selected in the Save As submenu. For example, if you click on the Word 97–2003 Document command in the Save As submenu, then this particular format will be automatically indicated in the File type list. If necessary, you can select a different format from this list.
Attention!
After you save the file using the Save As command, the original file will be closed and a new file will open in the Word window. To return to working on an old file, you need to open it again.
To learn how to quickly perform basic operations with Word files, try the following exercise.
1. Launch Word program by clicking Start > Programs > Microsoft Office > Microsoft Word 2007. You will see that the program has automatically created a document called Document1. Let's create another document.
2. Click on the Office button and in the menu that opens, select the New command (see Fig. 2.2).
3. In the window that appears, make sure that the New Document template is selected in the Empty and Recent section. If it's not, then highlight it. Click the New button in the lower right corner of the Create Document window. The document creation window will disappear and a new document window will open called Document2.
4. Enter arbitrary text and select the Save command from the Office button menu (see Figure 2.16).
5. In the Saving Document window that appears, use the address bar to go to the Desktop.
6. In the File name field, enter a name for the document, for example My first document. Make sure that Word Document is selected in the File type list (Fig. 2.21).
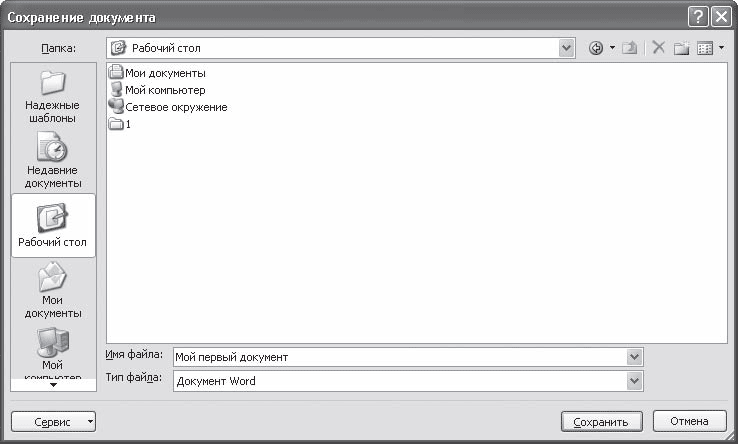
Rice. 2.21. Save document window
8. Make sure that the name of your file appears in the title bar of the Word window instead of the name Document2 (Fig. 2.22).
Rice. 2.22. Word document saved
9. Close the program window by clicking the Close button in the title bar.
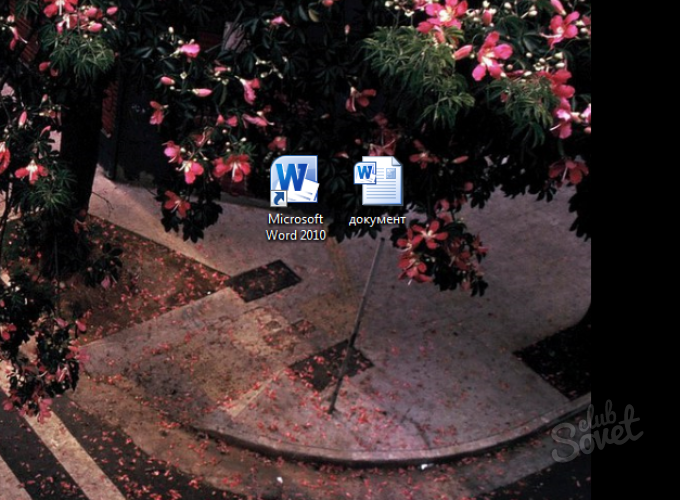
10. Go to the Desktop, find the one you created among other files and, by right-clicking on its icon, select the Open command in the context menu (Fig. 2.23). You will see that Word has loaded and your file is open.

Rice. 2.23. Opening a Word Document from the Desktop
To better reinforce basic file operations, try doing similar operations, such as creating and saving a file using keyboard shortcuts. The ability to quickly work with documents will be very useful to you.
Saving all open documentsIf you work with several documents at once, you often need the ability to save changes to them simultaneously. In the previous version of Word, the file menu had special team for this purpose – Save all. There is no such command in Word 2007, but you can add a special button to the Quick Access Toolbar. To do this, do the following.
1. Click on the Office button and in the menu that opens, click the Word Options button (see Figure 2.6).
3. In the Select commands from list, select the Commands not on the ribbon line and find the Save all command in the list (Fig. 2.24).

Rice. 2.24. Customizing the Quick Access Toolbar
4. Click the Add button. The Save All button will appear in the right list. Click OK to close the Word Preferences window. The added button will appear on the quick access panel (Fig. 2.25). Now, when you click it, changes will be saved in all open documents.
Another option for saving all open documents is to assign a keyboard shortcut to the corresponding command, such as Ctrl+S, which, as you already know, is used by default to save a single document. If you assign it to the Save All command, it can make your work easier. To assign a keyboard shortcut to a command, do the following:
1. Click on the Office button and in the menu that opens, click the Word Options button (see Figure 2.6).
2. In the window that opens, go to the Settings section.
3. Click the Settings button, which is located at the bottom of the window near the Keyboard shortcuts line. The Keyboard Settings window appears.
4. In this window, in the Categories list, select the Commands item not on the ribbon, and in the Commands list, select the line FileSaveAll.
5. In the New keyboard shortcut line, enter the appropriate combination (just press it on the keyboard) (Fig. 2.26).
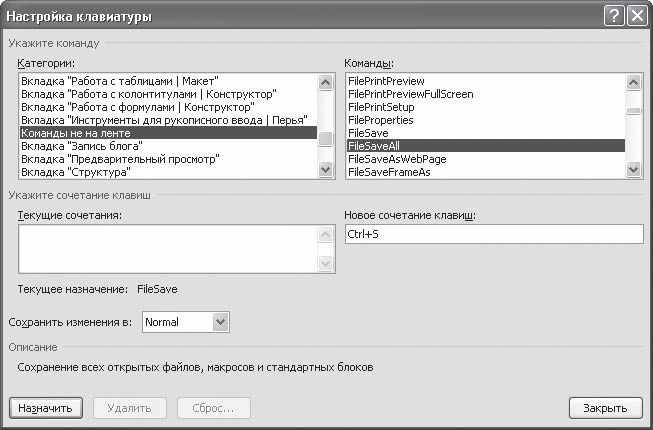
Rice. 2.26. Keyboard settings window
6. Click the Assign button. Click the Close button and then the OK button to close all settings windows.
AutosaveWord has many features to help users remember to save their work. One of them is autosave document. With its help, you can set the time interval after which the program will automatically save all changes made to the document. In this case, in the event of a program failure, there will be a chance that the last data entered but not manually saved will be saved. Autosave is enabled by default and runs every 10 minutes. The data is saved in the Drive:\Documents and Settings\Username\My Documents folder. To change your AutoSave settings, such as reducing the number of minutes after which AutoSave occurs, do the following:
1. Click on the Office button and in the menu that opens, click the Word Options button (see Figure 2.6).
2. In the window that opens, go to the Saving section (see Fig. 2.7).
3. In the Autosave every...minutes line, specify the period of time after which Word will save your work. You can increase it to two hours (that is, 120 minutes) or decrease it to one minute.
4. To change the folder where autosave will be performed, click the Browse button to the right of the Default file location line and select the desired folder.
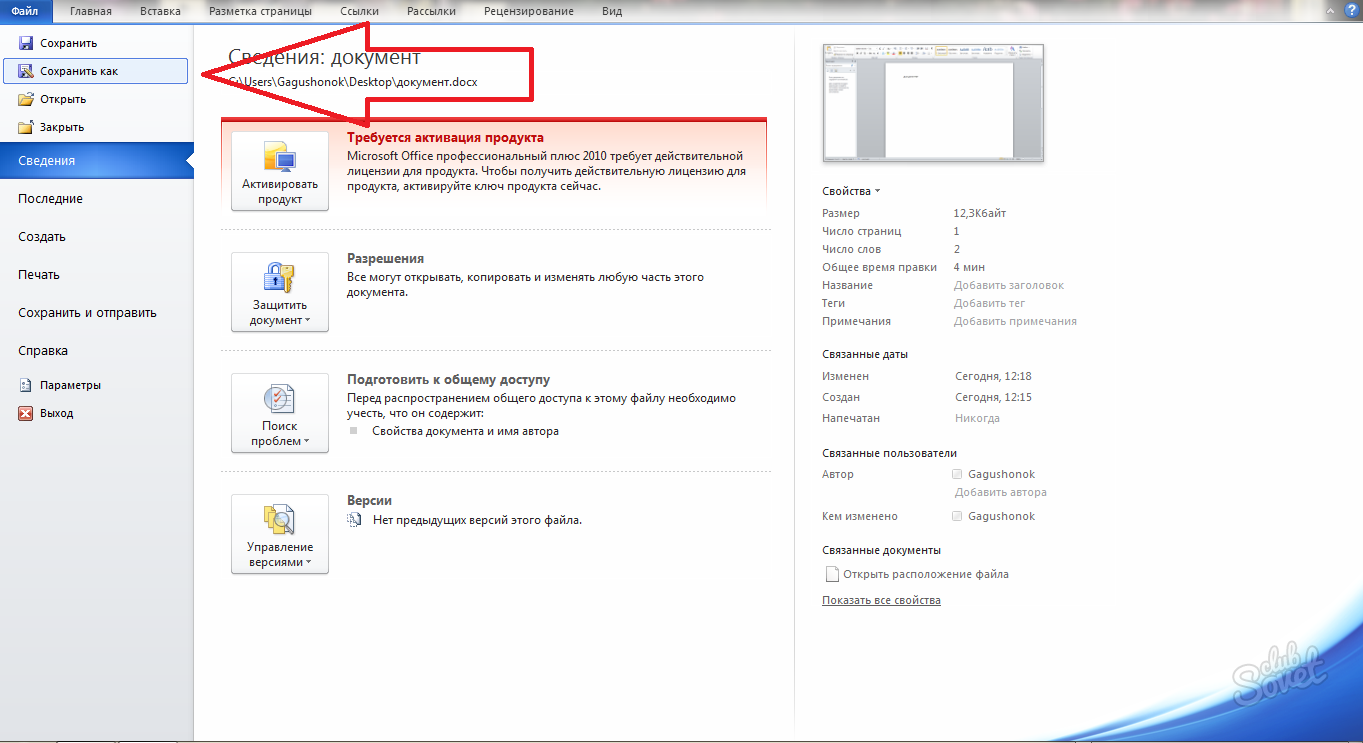
Document Properties
When working with Word documents, it is often necessary to save their properties, that is, to indicate what the this document who is involved in its creation and editing, include keywords and notes. This is especially true for documents that contain large number data on many pages. If someone wants to look at your work, document properties can quickly determine which data is particularly important.
To make the necessary entries, do the following.
1. Click on the Office button and in the menu that opens, select Prepare. A submenu will appear (Fig. 2.27).
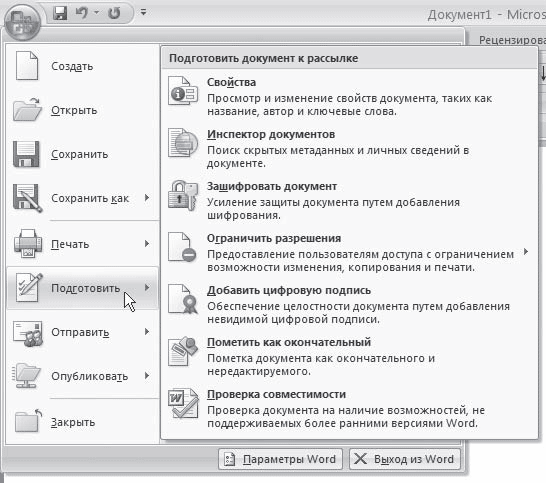
Rice. 2.27. Submenu Prepare Office Button Menu
2. Execute the Properties command. Under the ribbon at the top work area Data entry fields will appear (Fig. 2.28).
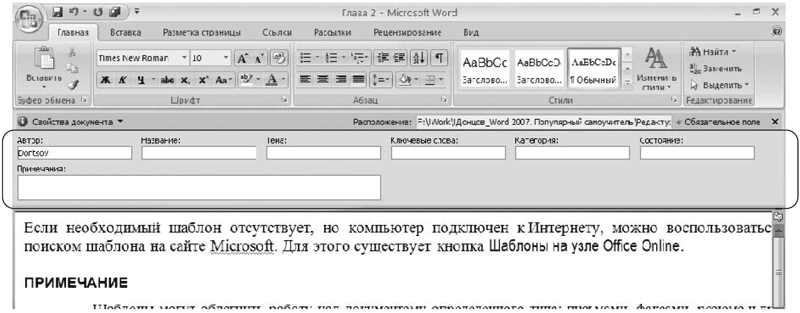
Rice. 2.28. Fields for entering document data
3. Fill in the required fields.
4. To open a window with additional properties, click the Document Properties button in the left top corner data entry area and select the Additional properties command in the menu that appears.
5. A window will open. The Document tab displays the data specified in the data entry area under the ribbon (Fig. 2.29).

Rice. 2.29. Document properties window, Document tab
6. In addition to the data already entered, this window contains various additional fields. If on the Document tab you select the Create a drawing for preview checkbox, the program will create an image of the document sheet that was visible on the screen at the time of saving. This image, as well as all data entered on the Document tab, will be shown in the folder window when a file is selected (Fig. 2.30).

Rice. 2.30. View of the file for which the preview image was created in the folder window
In addition to the information you specify on the Document tab, the Document Properties window displays the following information about the file.
The General tab (Fig. 2.31) contains information that is automatically recorded when saving a file: the path to the folder in which it is stored, size, format, date of creation and last modification.
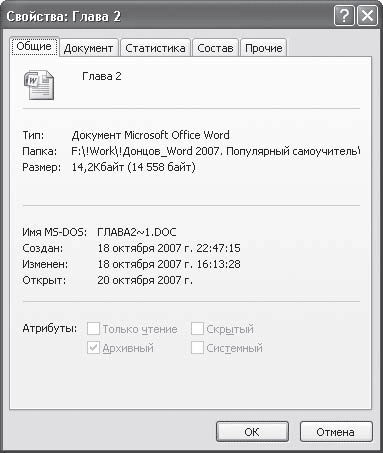
Rice. 2.31. Document properties window, General tab
The Statistics tab (Fig. 2.32) provides information about who and when changes were made to the document, how long it took to edit, as well as various statistical data: number of pages, paragraphs, words, icons, etc.
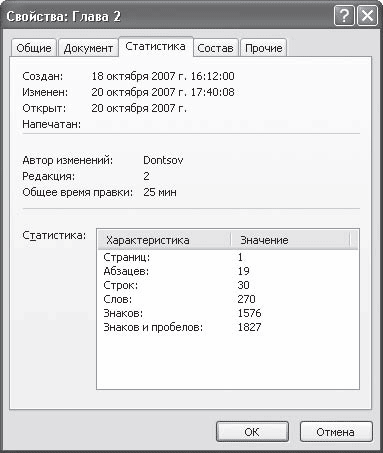
Rice. 2.32. Document properties window, Statistics tab
On the Composition tab (Fig. 2.33) you can view the structure of the document.
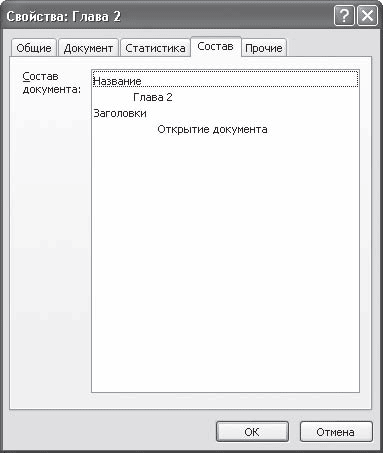
Rice. 2.33. Document properties window, Composition tab
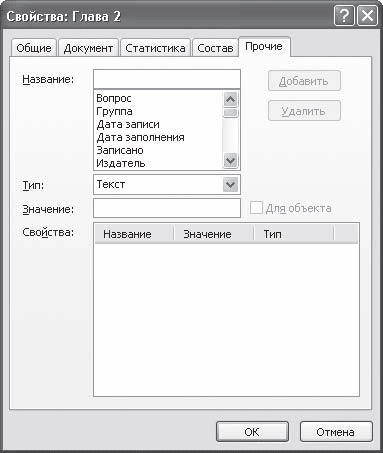
On the Other tab (Fig. 2.34) you can set additional properties, in particular working group, editor's name and other information. To enter additional custom properties:
· select a property from the Name list;
· select the property value type from the Type list;
· enter a value in the Value field;
· Click the Add button.
Rice. 2.34. Document properties window, Other tab
2.2. Simultaneous work with several documents
Microsoft Word allows you to work with several documents at the same time. In this case, each new document opens in a separate window, and the user, working in full-screen mode, sees only the last open document. If you need to move from one open document to another, you can use one of the following methods:
Click on the button of one of the open documents on the Taskbar (Fig. 2.35);
Rice. 2.35. Selecting a Word document from the Taskbar
Switch to the Ribbon View tab, in the Window group, click the Go to another window button and select the desired one in the list of open documents that appears (Fig. 2.36);

Rice. 2.36. List of open files
Apply the keyboard shortcut Ctrl+F6;
Press Alt+Tab and, while holding down the Alt key, press Tab until required document Word will not be selected (Figure 2.37).
Rice. 2.37. List of open applications that appears when you press Alt+Tab
Note
When you press the Alt+Tab keys, the list that appears will contain not only open documents Word, but also all other windows running in at the moment programs.
Window management
In Word 2007, the close document button coincides with the close button of the program window (Fig. 2.38). If several documents are open, then when you close one of them, the rest remain open. When closing last document This button also closes the program window.
Rice. 2.38. Close document button
In addition, the document can be closed using the keyboard shortcut Ctrl+W or the Close command from the Office button menu (Fig. 2.39). In this case, after closing the last document, the program window remains open.
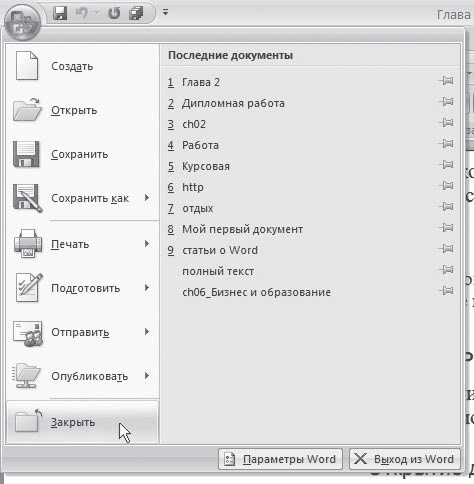
Rice. 2.39. Office Button Menu Close command
If at the time of closing the changes in the document have not been saved, a window will appear asking whether it is worth saving the changes in the document. To confirm saving the changes, click the Yes button; to reject, click the No button. To return to the document and continue working with it, click the Cancel button.
Attention!
If you ignore the prompt to save the document when closing a document, the unsaved data will be lost.
Comparing two documents
In earlier versions of Microsoft Word (for example, in Word 97), each document had three window size control buttons, which duplicated the program window size control buttons and differed only in that their action extended to the current document. With their help, it was possible to collapse documents and place them side by side in the program window. In Microsoft Word 2007, this can be done using the Next command, which is located in the Window group of the View tab on the ribbon (Fig. 2.40). If two windows are open when executing this command, the program will place them side by side on the screen (Fig. 2.41). If more than two windows are open, the Compare side by side window will appear (Fig. 2.42), in which you will need to indicate which document you want to compare the current one with.
Rice. 2.40. Near Button
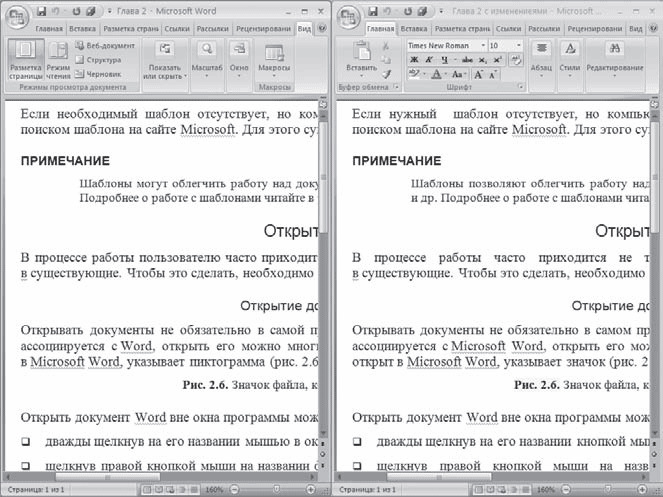
Rice. 2.41. View of documents after executing the Compare next to command
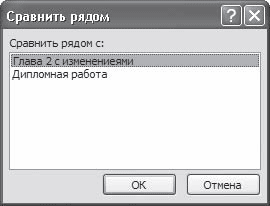
Rice. 2.42. Compare side by side window
When you switch to the document comparison mode, the synchronous scrolling mode is automatically activated, that is, when you scroll one document, the second will also scroll. To disable synchronous scrolling, you need to click on the Window button and release the pressed Synchronous scrolling button (Fig. 2.43). To enable scrolling again, you need to click on this button again.
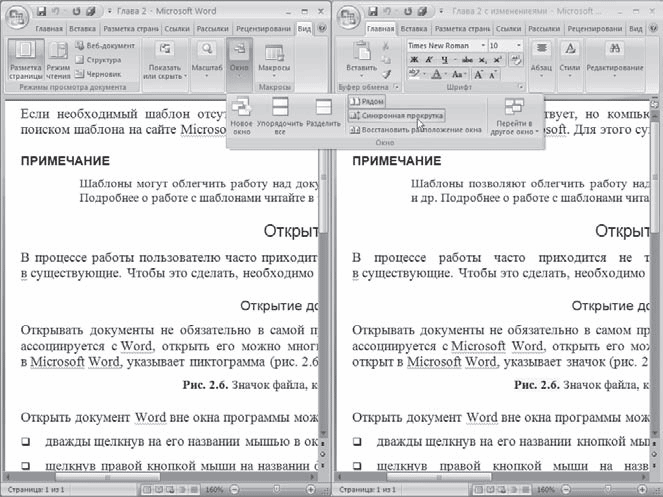
Rice. 2.43. Window button menu
The Restore window position button allows you to return the position of two windows next to each other if, for example, one of the windows is minimized.
To exit document comparison mode, you must do one of the following:
Click the Next button in the Window button menu (see Fig. 2.43);
Click the Maximize button, which is located at the top of the window, next to the close button.
Comparing multiple documents
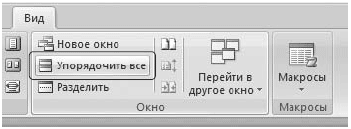
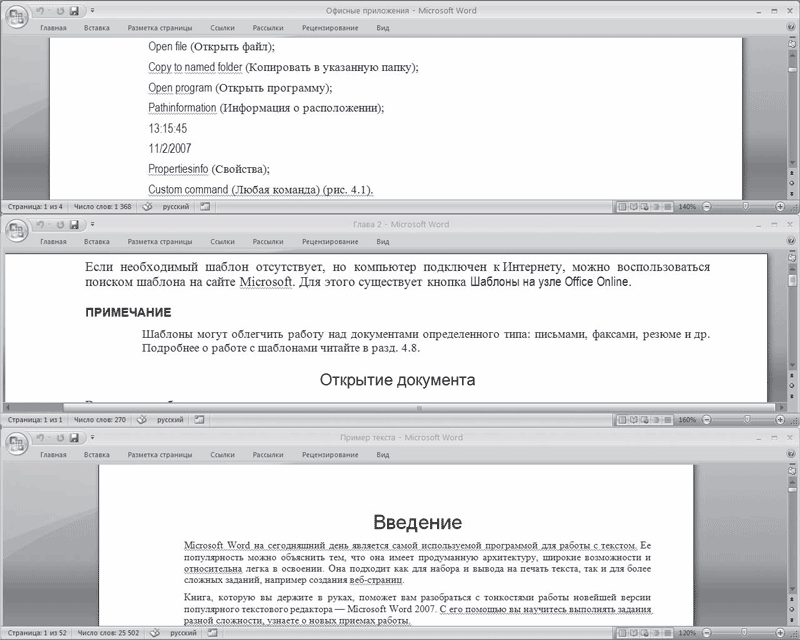
If you need to compare several documents at once, you can use the Arrange All command, which is located in the Window group of the View tab on the ribbon (Fig. 2.44). After completing it, all open documents will be placed on the screen, and you can easily compare them and make the necessary adjustments (Fig. 2.45). The size of any window can be changed if necessary.
Rice. 2.44. Arrange All button

Rice. 2.45. Word window after organizing open documents
Attention!
If you close one of the documents or open a new document, the arrangement will not be saved.
This mode is convenient to use by folding the tapes to increase the working area (Fig. 2.46). How to roll the ribbon, read in section. "Tape" ch. 1.
Rice. 2.46. Organizing documents with rolled tapes
Splitting a window into several areas
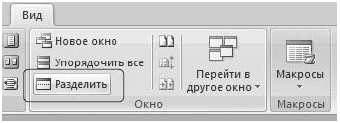
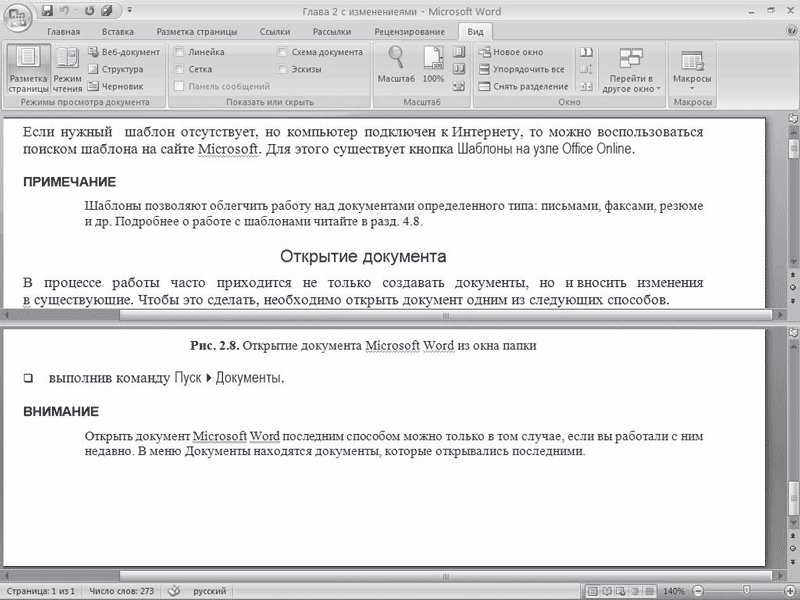
In some cases, such as when working with a large document, you may need to keep two areas of the document in view at the same time. To do this, there is a Split command, which is located in the Window group of the View tab on the ribbon (Fig. 2.47). After completing it, a layout line will appear on the screen, the position of which can be set by clicking the mouse button (Fig. 2.48).
Rice. 2.47. Split button
Rice. 2.48. View of the Word window after partitioning
2.3. Document scale
Zoom helps you increase or decrease the size of the document that appears on the screen. The scale affects only the appearance of the document on the computer screen, and not the image obtained when printed! Using zoom, you can see a large number of document pages at once, or you can view just a few lines if you need to look at the data in detail.
To change the document scale, do one of the following:
By moving the slider at the bottom of the window to the left or right, reduce or increase the scale within the range from 10 to 500% (Fig. 2.49).
Rice. 2.49. Slider to change the scale at the bottom of the window
Click the zoom button at the bottom of the window next to the zoom slider. As a result, a window will open in which you can select the scale of the document (Fig. 2.50).

Rice. 2.50. Window Scale
You can make any changes to the document divided in this way. When the split is no longer needed, execute the Remove Split command, which is located in the Window group of the View tab on the ribbon.
Go to the View tab of the ribbon and in the Scale group, click on the button corresponding to the desired scale (Fig. 2.51). Here you can choose to display 1:1, full page, two pages, or fit to page width. When you click the Zoom button, a window of the same name will open (see Fig. 2.50).
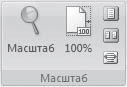
Rice. 2.51. Scale group of the View tab
2.4. Document viewing modes
Microsoft Word is a multifunctional program. The documents created in it can be very different - from small text notes to web pages and large projects on which a large number of users work. Obviously, such different documents need to be viewed in different ways. If the final stage of working on a document is printing it, it is advisable to see how it will look on a sheet of paper and how many pages it will contain. If you are creating a web page, then you definitely need to evaluate how it will look in the browser. Finally, if you're working on a large document that contains many sections and subsections, it's much easier to navigate through it using headings.
Word provides several document viewing modes:
Page layout;
Reading mode;
Web document;
Structure;
Draft.
You can switch between document viewing modes using the Document Viewing Modes group of the Ribbon View tab (Fig. 2.52) or using the buttons located in the status bar (Fig. 2.53).

Rice. 2.52. Document viewing modes group
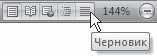
Rice. 2.53. Buttons for switching document modes in the status bar
In addition to these modes, which are basic, there are several additional ones:
Document Outline and Sketches, which can be switched to using the Show or Hide group of the Ribbon View tab;
A preview that you can access by choosing Print > Preview from the Office Button menu.
Let's look at the features of working with each mode.
Page layout
In the Page Layout mode (Fig. 2.54), the document is displayed in the form in which it will be printed. In this mode, all pictures are visible, there are headers and footers, vertical rulers, columns, margins and page borders. The document itself is divided into pages that are clearly separated from each other. This mode is convenient when working with documents that will subsequently be printed. In Page Layout mode, it is convenient to manually set document margins using horizontal and vertical rulers.

Rice. 2.54. Microsoft Word window in Page Layout mode
Reading mode
Reading mode was created to allow users to freely read and navigate through a document without printing it (Fig. 2.55). The name of this mode speaks for itself - it is most convenient to work with a document if you need to study in detail what is written in it.

Rice. 2.55. Microsoft Word window in reading mode
In reading mode, two pages are displayed in full screen with maximum size, while the ribbon, quick access toolbar, rulers, status bar, etc. are not shown on the screen. Tools are available that allow you to make notes in the text - highlight with color and create notes. The Service button allows you to access some other tools (Fig. 2.56). You can also save and print the document using the appropriate buttons in the upper left corner of the window.

Rice. 2.56. Service button menu
You can switch between pages in several ways:
By clicking the button with an arrow in the right (to go to the next page) or in the left (to go to the previous) corner of the window;
Clicking on the right or left edges of the page when the mouse pointer is in the shape of a palm;
By clicking the Previous screen or Next screen buttons, which are located at the top of the window and look like arrows;
Using the mouse wheel or the Page Up and Page Down keys;
Using the menu that appears when you click at the top of the window on the image of the current page (Fig. 2.57). Using this menu you can go to a specific page. In addition, here you can enable the display of the document outline or thumbnails.

Rice. 2.57. Menu for switching between pages
By clicking the View Options button, you can configure viewing of the document in a form convenient for you (Fig. 2.58).
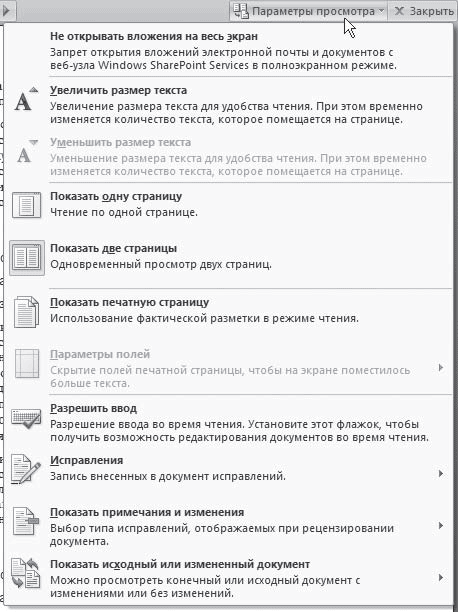
Rice. 2.58. Reading mode settings
To exit reading mode, click the Close button in the upper right corner of the window.
Web document
The Web Document mode is intended for creating web pages or documents that will be viewed on the screen (Fig. 2.59). In this mode, you can see the background of the page. Regardless of the page layout, in Web Document mode, text always fits in the document window. Graphics in this mode are positioned as they would be visible in the browser. Thus, the Microsoft Word window in this mode resembles an Internet browser window, and you can see how your document will look in the browser.

Rice. 2.59. Microsoft Word window in Web Document mode
Structure
The Structure mode is used when creating large documents rich in headings and subheadings (Fig. 2.60). To work with this mode, the document must be formatted using styles (see Section 4.7), otherwise this mode will not be able to help.
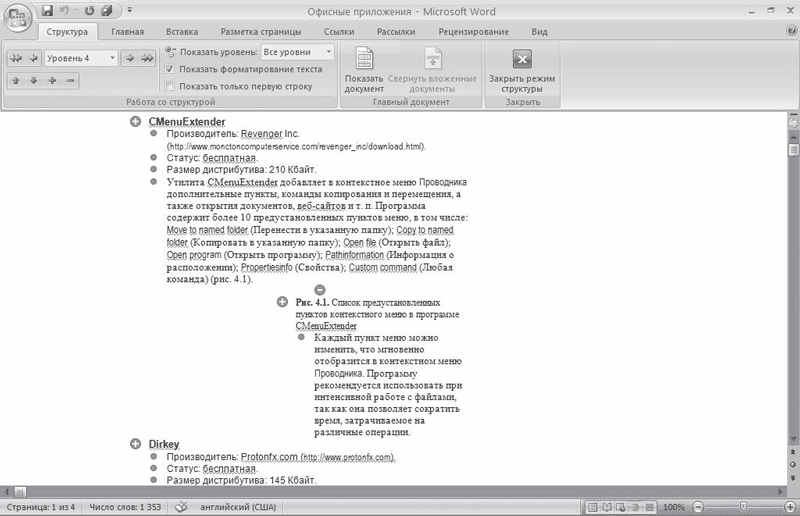
Rice. 2.60. Microsoft Word window in Outline mode
The Structure mode allows you to control the harmony and consistency of the presentation of materials in the text. In this mode, paragraphs and headings are indented to indicate their level. The lower the title level, the greater its indentation from the left border of the window. To make the level of each heading more clear, the text can be collapsed and only the position of the headings can be observed. In the Structure mode it is convenient to work with the main document, which allows you to group files of several parts or chapters in a large document. In the Structure mode, headers and footers, graphic objects, backgrounds, and paragraph formatting are not displayed.
When you switch to Outline mode, the Outline contextual tab appears on the ribbon. It contains special tools for working in this mode, allowing you to quickly collapse and expand text, and rearrange the document.
Note
Outline mode requires special Word skills. It is difficult for inexperienced users, so detailed description this mode is given in section. 7.3.
Draft
The Draft mode (Fig. 2.61) was created for typing and formatting text. It does not show the page layout; some page design elements, such as headers and footers, do not display pictures. But in this mode, text formatting elements are visible. When working in Draft mode, you can see the largest possible portions of text on the screen, since it does not display page margins. It also makes it easy to scroll text in a window. If you are working with a multi-page document, the bottom edges of the page will appear as dotted lines in this mode.

Rice. 2.61. Microsoft Word window in Draft mode
Document outline
The Document Outline mode is an additional mode and works with any of the ones discussed above. With its help, you can quickly navigate between different sections and subsections of a document, and also view the structure of the document. To use this mode, as when using the Structure mode, the document must be formatted using styles.
When switching to this mode, the Microsoft Word window is divided into two parts (Fig. 2.62). The document itself is displayed on the right in the previously selected mode. The elements of the document structure will appear on the left. To quickly jump to any place in the document, simply click on the desired heading on the left side.
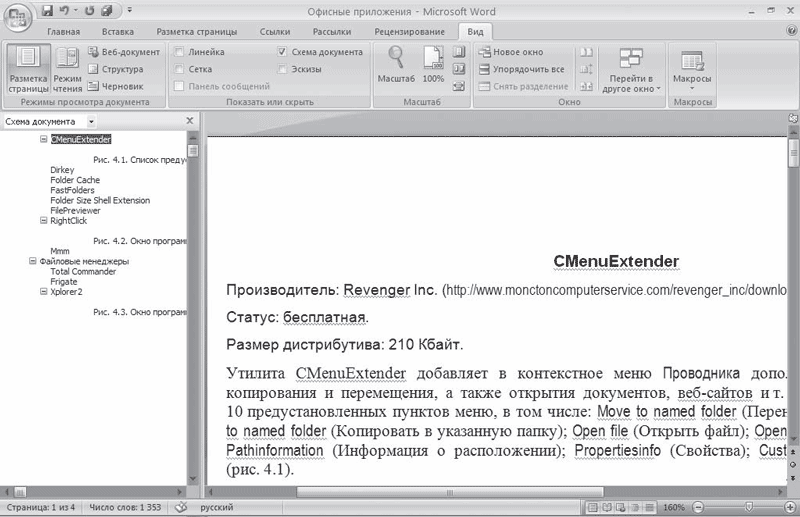
Rice. 2.62. Microsoft Word window in Document Outline mode
Note
Read more about working with the Document Outline mode in section. 7.3.
Sketches
The Sketches mode, like the previous one, is also additional and works with all main modes. This mode allows you to conveniently switch between pages. When using it, page thumbnails appear on the left side of the document, and the selected page is presented on the right side of the window (Fig. 2.63). When you click on a thumbnail, the corresponding page appears on the right side.
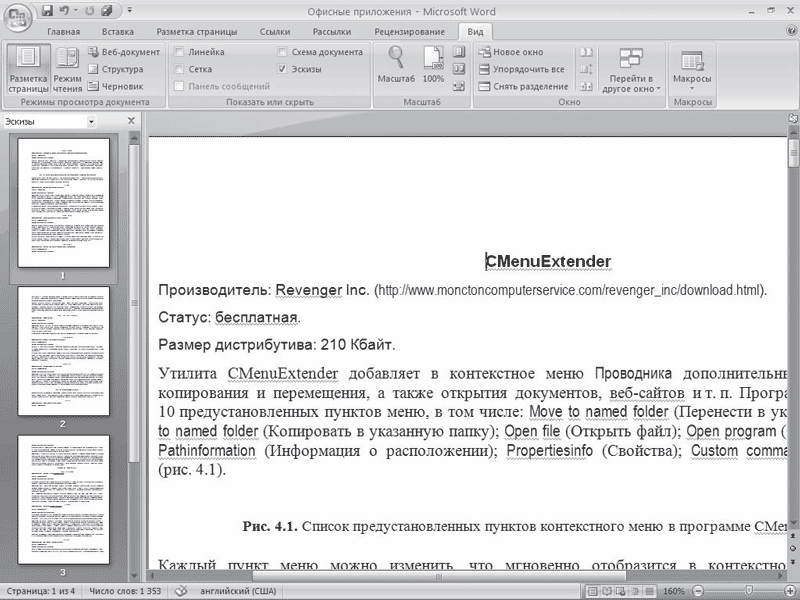
Rice. 2.63. Microsoft Word window in Thumbnail mode
Preview
The Preview mode, which is enabled using the Print > Preview command or the Ctrl+F2 keyboard shortcut, allows you to preview the document before printing. In this mode, you can see one or several pages of the document in full on the screen (Fig. 2.64).
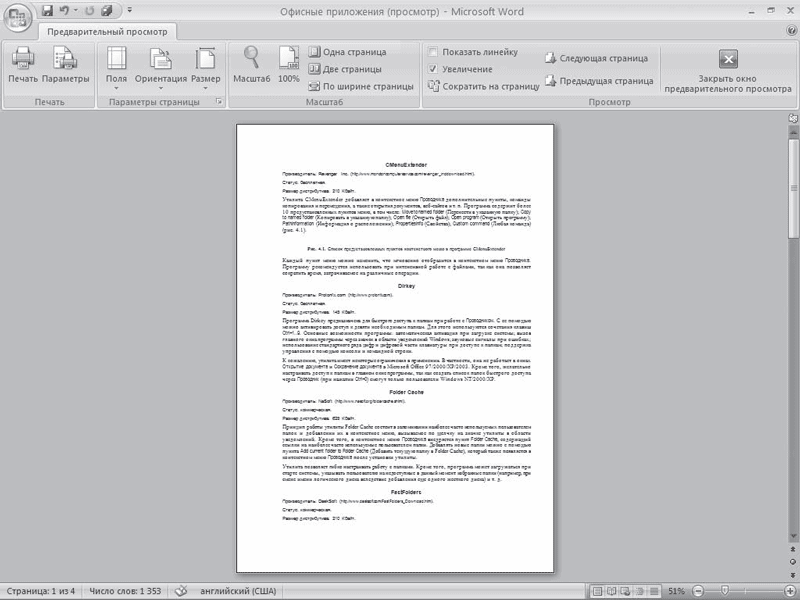
Rice. 2.64. Microsoft Word window in Preview mode
This mode helps determine how the document will look when printed. It will be especially useful if the document contains graphics and other embedded objects. Even if the document contains nothing but text, be sure to preview the document in this mode before printing. It often happens that in it you can see a few lines of text that have moved to the next page, or other minor flaws and immediately correct them.
In Preview mode, instead of the standard tabs on the ribbon, there is only one - Preview. Using the tools of this tab, you can send a document for printing, open a window with print settings, set margins, orientation and sheet size. In addition, you can configure display parameters: display or hide rulers, enlarge individual parts of the page, and determine the display scale.
Pay attention to the Shrink to Page button, which is located in the View group on the ribbon. If, while viewing, you notice that several lines do not fit on the last page, use this button. The program will make some formatting adjustments (for example, make the font a little smaller), which will be almost invisible, and the document will look much better, since the last page will be filled out and will not contain only two lines.
To exit Preview mode, click the Close Preview Window button on the ribbon.
Advice
If you have questions related to the topics covered in this chapter, please refer to Section 11.3 – perhaps you will find the answer to your question.
Creating text document, you have the opportunity to electronically store all the information you need, forward it to friends and colleagues, and print it at any convenient time. The type of document itself is determined by its format, the most popular of which are: doc, docx, pdf, txt. If you have Microsoft Office Word installed, you can easily create a text document directly on your computer or laptop, as well as mobile device.
How to Create a Text Document in Microsoft Office Word
This convenient way to format, change and add to the file. You can change such documents at any time, as soon as you like.
- To get started, install the program or find it on your computer.
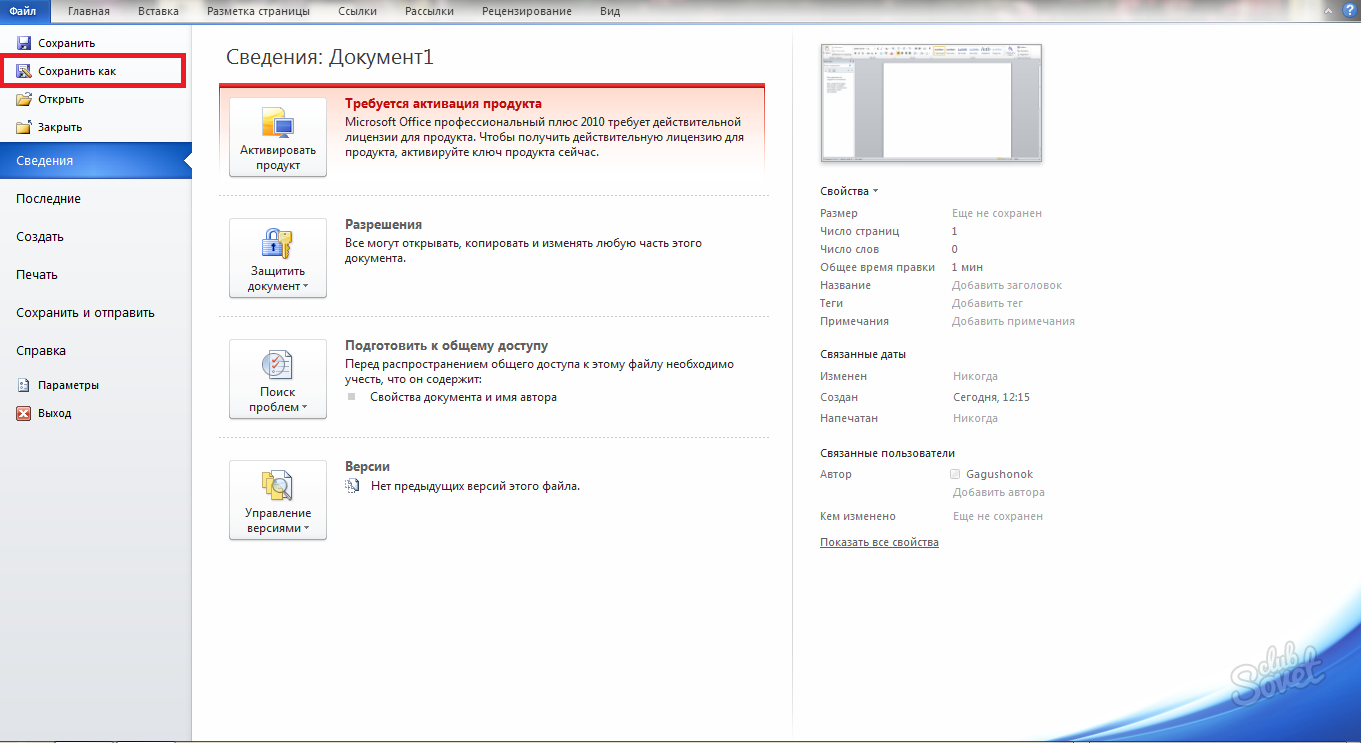
- On the white field you can create your own text, enter headings, and insert pictures. Once you have done everything necessary, click on the “File” button in the upper left corner.

- From the drop-down list, select the “Save As” line.
- Now select the folder where your file will be stored and enter its name. After this, click “Save”.
- So easy you made it doc file, where all text data will be located until you delete the document or change it.
How to create a PDF text document
An equally popular format created for distributing and storing data. It is difficult to change once created, so it is better to distribute books, booklets, invitations, instructions and other similar files this way. It is created in the paid version of Adobe Acrobat Reader Pro. But in Microsoft Word, starting with version 2010, you can also create one.
- Click on the “File” button when you have already entered all the necessary text.

- Go back to the "Save As" tab.
- Now you need the "file type" line. Select “PDF” from the drop-down list and save the document.
Your PDF document will now be in the save directory.

How to create a text document in Notepad
The simplest and quick way creating a text document. However, this lightweight program has absolutely no formatting functions: your file will be the same font and size. This method is best used for personal storage of text that you don't want to forget.
- Open Start in your computer's Explorer. If it already has Notepad, then just open it. If not, use the search bar. Type “Notepad” in it.
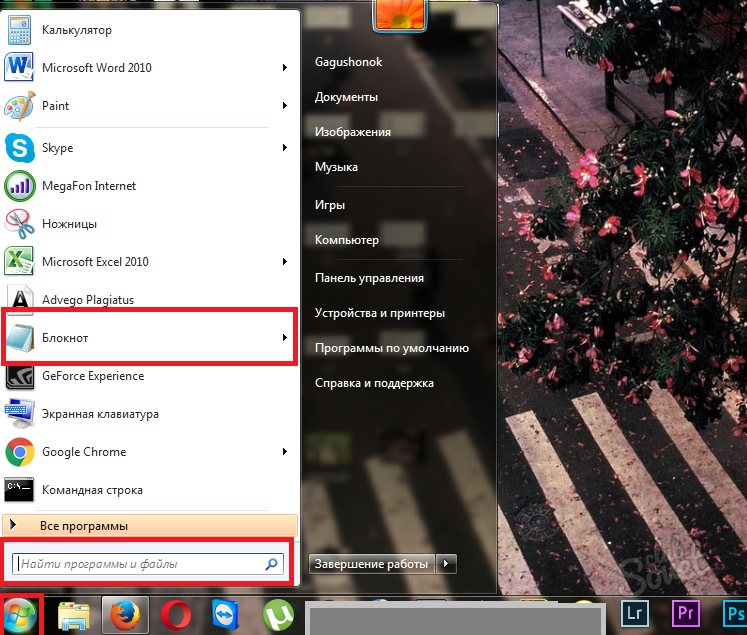
- Click on the program to open it.

- Enter all required text. Then follow the already familiar path: “File” - “Save As”.
- Enter the file name and storage location in the appropriate lines.

- Now you know how three types of text documents are created.

How to create a text document on your phone
It all depends on what program is installed on your mobile device. On new models on the Android OS it is installed complete package Microsoft Office. Try creating a file in it.
- In the phone menu, select the “Microsoft Applications” section.

- In them, click on the “Word” program.

- In the upper right corner you will see a “Create” button and a plus next to it.

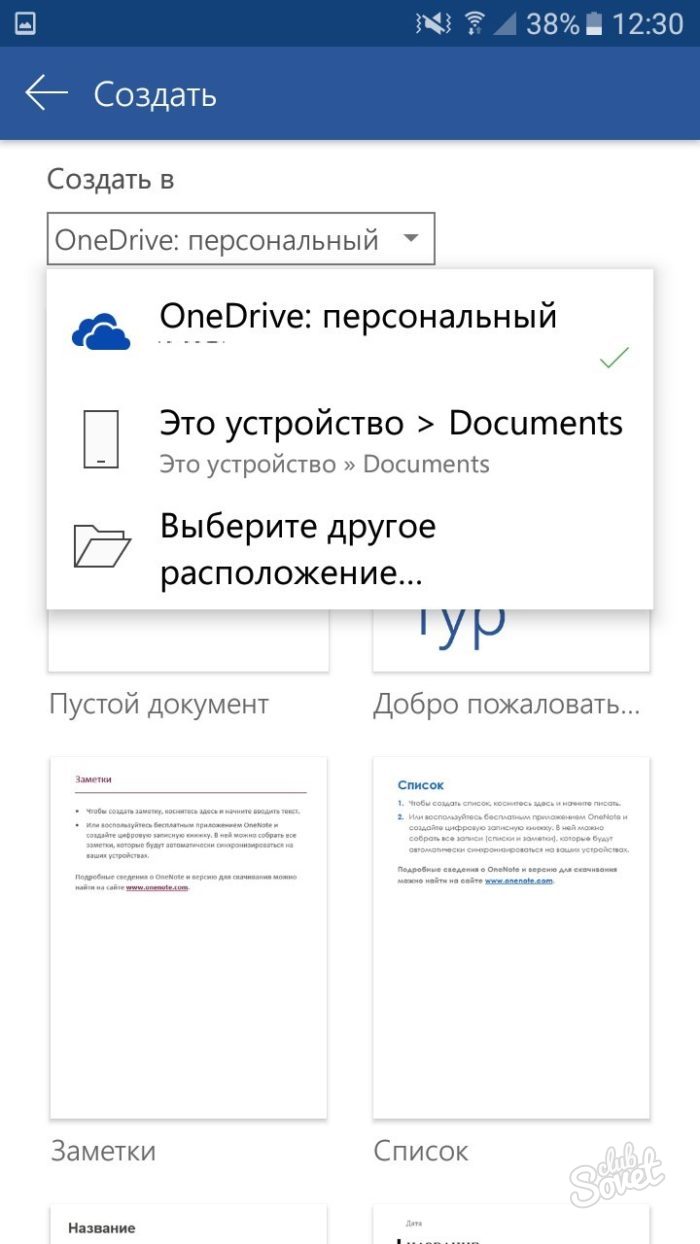
Immediately designate the storage location for the future file:
- OneDrive virtual storage.
- Your phone.
- Another option is to send it by email or social networks.
- Now write down all the necessary data, format it if necessary. Click on the three bars in the left corner of the program.
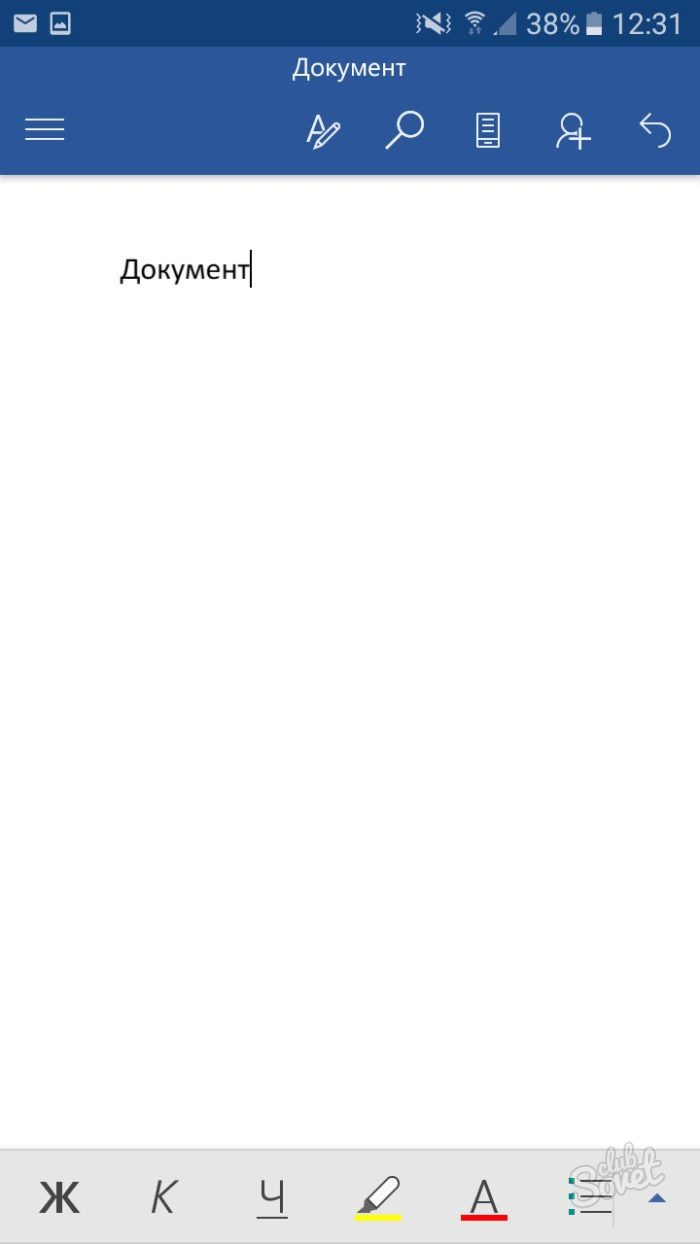
- Select the “Save As” line.

- All you have to do is choose a specific location to store your text document.

Now you can easily create any text document format, format it or change it, both on your computer and on your phone.
Have you ever created really large documents in Microsoft Word? If so, you probably know that Word doesn't always handle them well. Sometimes it makes more sense to split a long document into several separate Word files.
But how can you be sure that the pages are numbered correctly, and how can you create a table of contents and index for the entire document? In this case, a tool called Master Document(Main document). It allows you to combine multiple Word files into one.
Main document is a Word file that contains links to a list of other independent Word files called attached documents. The contents of attached files are not transferred to main document, but only connected with it. This makes it possible to edit nested documents individually. Any changes made to subfiles are automatically reflected in the main document. If several people are working on one project at once, the master document allows you to distribute separate parts of it to different participants for simultaneous work.
In this article we will show the basic techniques for creating a main and subdocuments from a sketch, as well as creating a main document from existing files. We'll also show you how to easily add content to the beginning of your main document.
Creating the main document from a sketch
If you start creating a main document without having any finished material, you can create it from a sketch. To do this, create a new Word document and save it, giving it a file name that makes it clear that this is the main document.
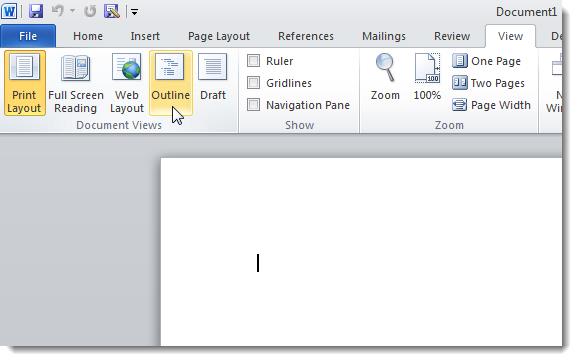
After you have saved your main document, go to the tab View(View) and press Outline(Structure) in section Document Views(Viewing modes).
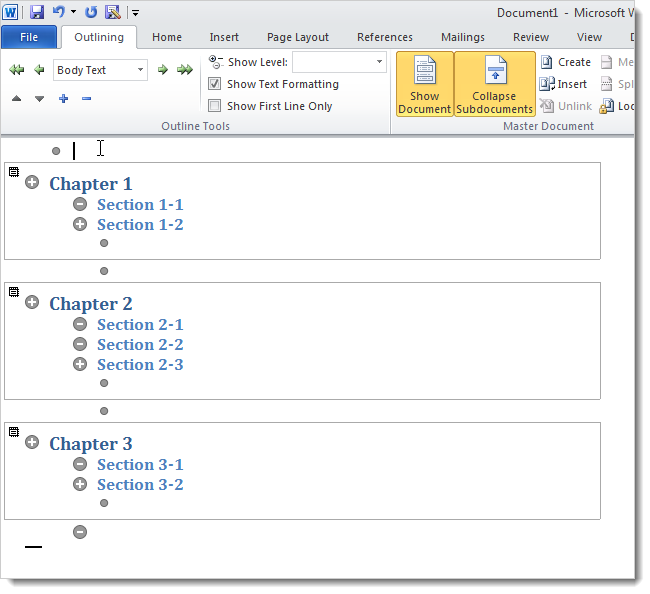
Enter headings for your document in outline view, changing their levels. To do this, use the drop-down list of levels or the green arrows in the section Outline Tools(Working with structure).
![]()
When you have entered all the headings you want, press the command Show Document Master Document(Main document).

In the section Master Document(Main Document) new features will become available. Select the entire document structure and click Create(Create).

Pressing this command encloses each document in its own container. At this point, save the main document again.
Each container in the main document becomes a separate file, as shown below. The name of the first header in each main document container is used as the file name for the corresponding subdocument.
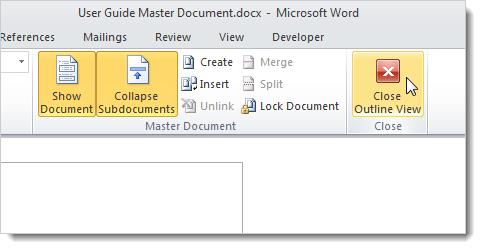
To return to a previous viewing mode, such as Print Layout(Page Layout), click Close Outline View(Close Outline Mode) under Close(Closing).
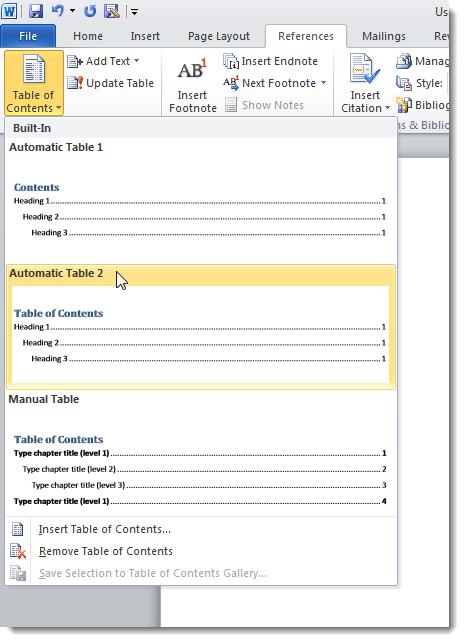
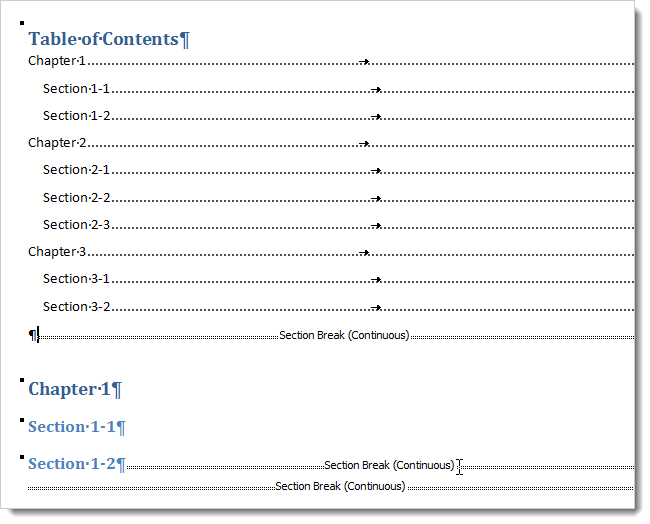
To add content to your main document, place the cursor at the beginning of the document and open the tab References(Links). Click on the drop down menu button Table of Contents(Table of Contents) and select one of the auto-assembled table of contents options to insert the auto-assembled table of contents at the selected location.
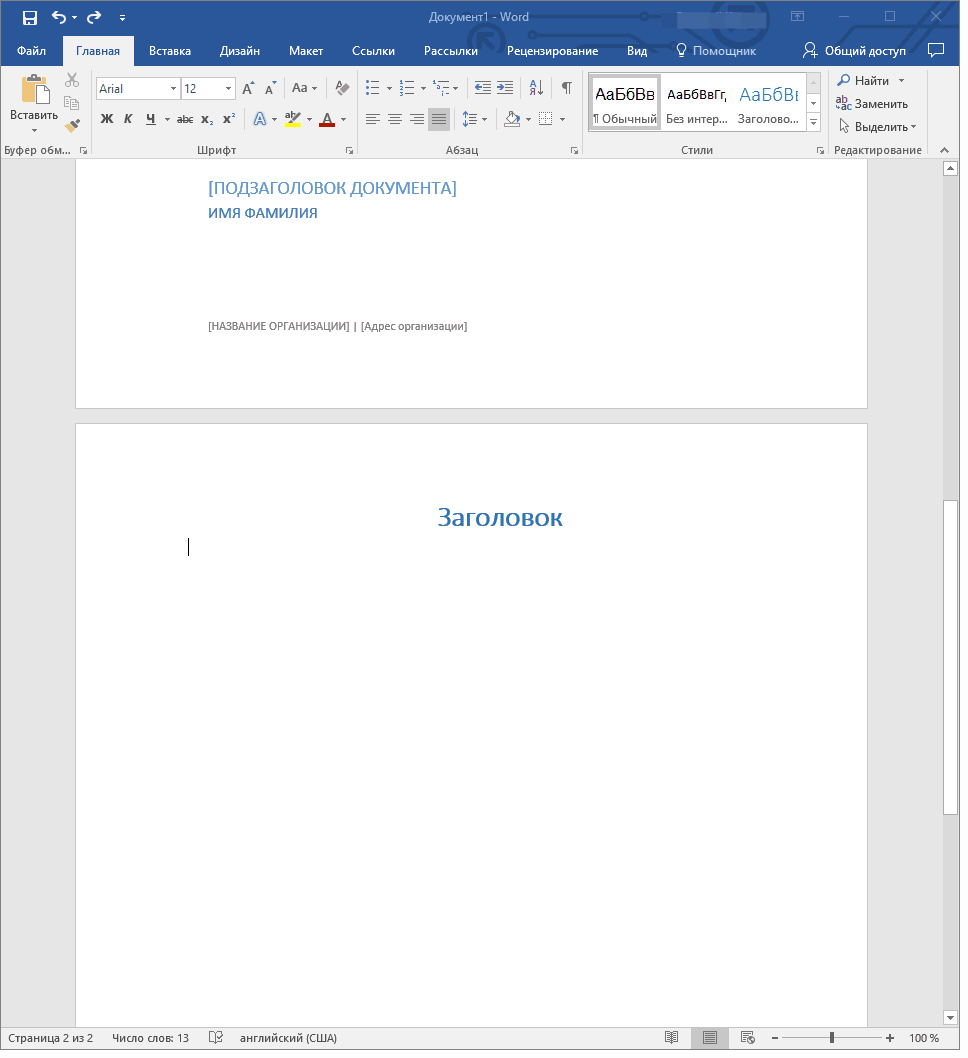
To see the section breaks Word inserts when creating subdocuments, go to the Home(Home) and click the line break symbol in the section Paragraph(Paragraph).
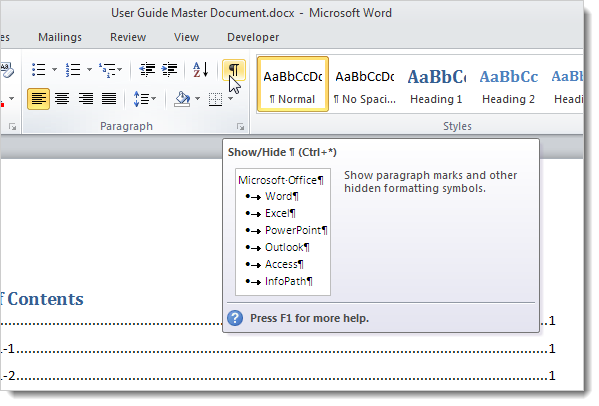
Word will show the section breaks and their type.
When you create a main document from a sketch, Word inserts a section break (on the current page) before and after each subdocument you create. This means that your document has no pagination. However, you can easily change the type of each section break.
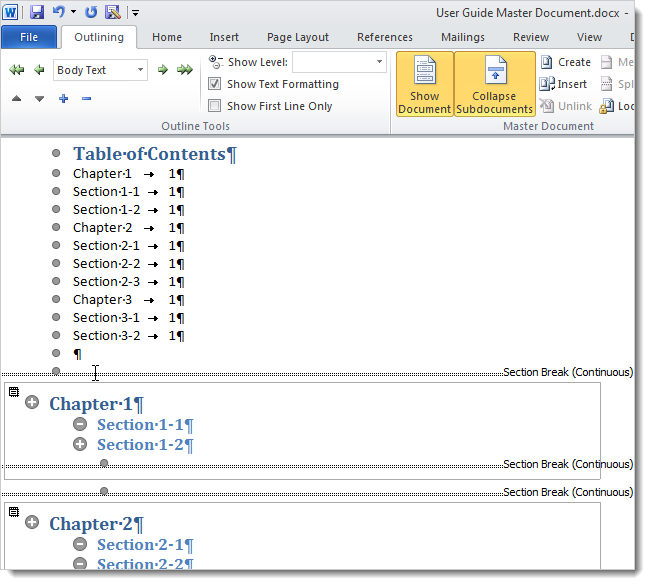
The following image shows what your document looks like in outline view with subdocuments expanded.
Create a main document from existing Word files
If you already have some templates and you want to include them in the main document, you can create a new file for the main document and insert existing files into it as attachments. To do this, create a new, blank Word document and save it as we did earlier when creating a master document from a sketch.
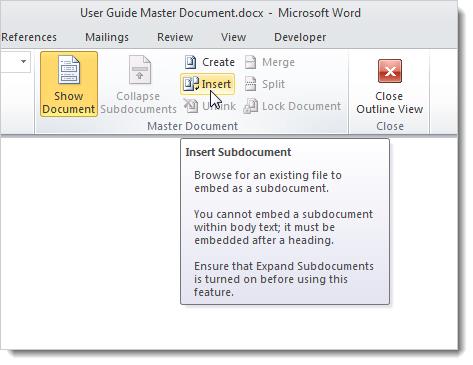
Go to the tab View(View) and in the section Document Views(Viewing modes) select Outline(Structure). The active tab will appear on the Ribbon Outlining(Structure). Click Show Document(Show document) in section Master Document(Main Document) to enable additional functions. To add subdocuments to the main document, click Insert(Insert).
In the dialog box Insert Subdocument(Insert Attached Document) Browse to the location of the Microsoft Word documents you want to insert. Select the first file you want and click Open(Open).
For convenience, store subdocument files in the same folder as the main document file.

If a dialog box like this appears, informing you that a certain style is present in both the subdocument and the main document, click the button Yes to All(Yes for everyone). This way, all styles in subdocuments will match those set in the main document.

Repeat the same steps for all documents that need to be attached to the main document. When you're done, you can collapse all subdocuments if you want. To do this, click Collapse Subdocuments(Collapse subdocuments) in the section Master Document(Main document) tab Outlining(Structure).

To collapse subdocuments, the main document must be saved. If you have not done this before, a dialog box like this will appear. Click OK to save the document.

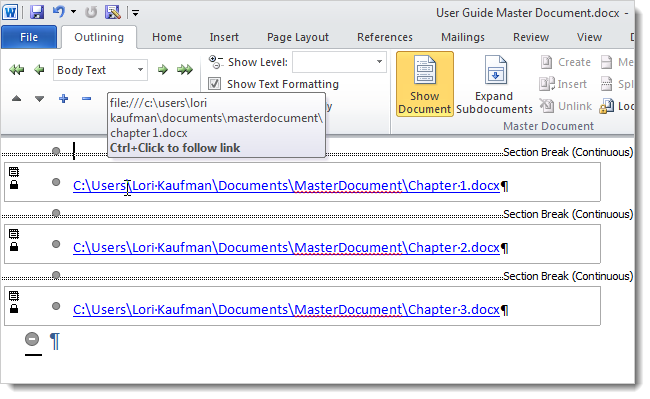
Notice that each master document container shows the full path to the subdocument file. To open an attached document for editing, you need to double-click on the document icon in the upper left corner of the container or click on the link to the file while pressing the key Ctrl.
When you insert an existing file into a main document, Word adds a section break (from the next page) before each subdocument, and a section break (on the current page) after each subdocument. If you wish, you can change the type of each break.
To view the main document not in outline view, go to the tab View(View) and select a mode Print Layout(Page Layout) or any other.
![]()
You can add content in exactly the same way as we did earlier when we created the main and subdocuments from outlines.

By inserting all subdocuments into the main document, you can add or edit headers, footers, create a table of contents (as already shown), an index, or work with other things that usually make up a complete document.
When you edit a subdocument, its content in the main document is updated. This is true when creating a master document using any of the methods discussed in this article.
Main documents in earlier versions of Word sometimes corrupted subdocuments. You may encounter this issue in Word 2010 as well. More detailed information For information about this problem, visit the Microsoft Customer Support website.
If you often work in MS Word, saving a document as a template will probably interest you. So, having a template file with formatting, fields and other parameters that you set can greatly simplify and speed up the workflow.
A template created in Word is saved in DOT, DOTX or DOTM formats. The latter allows working with macros.
What are templates in Word
Sample is a special type of document; when it is opened and subsequently modified, a copy of the file is created. The original (template) document remains unchanged, as does its location on the disk.
As an example of what a document template can be and why it is needed at all, you can give a business plan. Documents of this type are quite often created in Word, therefore, they are also used quite often.
So, instead of re-creating the document structure each time, choosing appropriate fonts, design styles, and setting margin sizes, you can simply use a template with a standard layout. Agree, this approach to work is much more rational.
A document saved as a template can be opened and filled in with the necessary data and text. At the same time, saving it in the DOC and DOCX formats standard for Word, the original document (the created template) will remain unchanged, as mentioned above.
Most of the templates that you may need to work with documents in Word can be found on the official website (). In addition, you can create your own templates in the program, as well as change existing ones.
Note: Some templates are already built into the program, but some of them, although displayed in the list, are actually located on the Office.com website. After you click on such a template, it will be instantly downloaded from the site and available for use.
Create your own template
The easiest way to start creating a template is with a blank document, which you can open by simply launching Word.
If you are using one of the latest versions of MS Word, when you open the program you will be greeted by a start page on which you can already select one of the available templates. What’s especially pleasing is that they are all conveniently sorted into thematic categories.

However, if you want to create a template yourself, choose “New document”. A standard document will open with its default settings. These parameters can be either programmatic (set by developers) or created by you (if you previously saved certain values as default ones).

Using our lessons, make the necessary changes to the document, which will later be used as a template.
In addition to performing the above steps, you can also add a watermark, watermarks, or any graphics as default settings for the document to be used as a template. Everything you change, add and save in the future will be present in every document created based on your template.
Lessons on working with Word:
After you make the necessary changes, set default parameters to the future template, you need to save it.
1. Click the button "File"(or "MS Office", if you use old version Word).

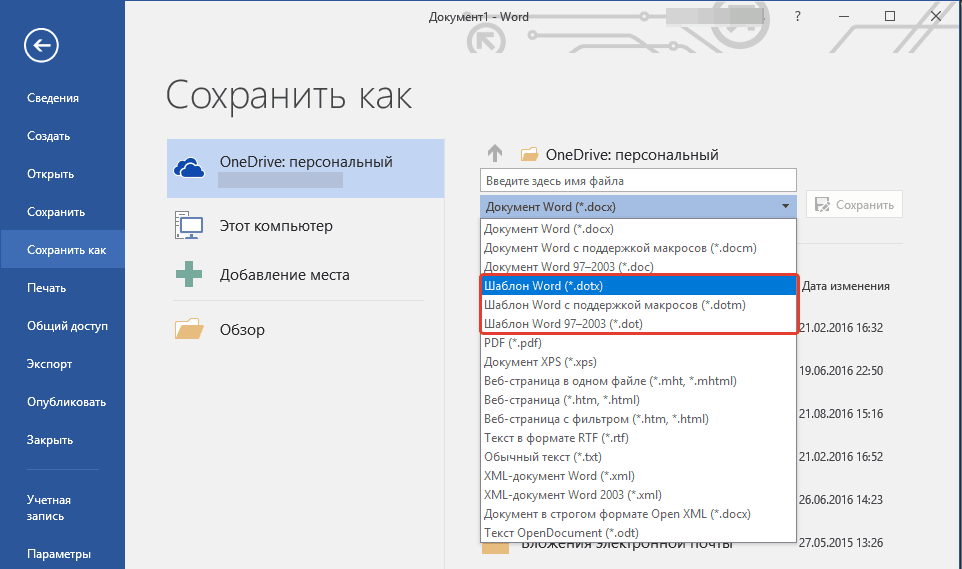
3. In the drop down menu “File type” select suitable type template:
- Word template (*.dotx): a regular template, compatible with all versions of Word older than 2003;
- Word template with macro support (*.dotm): as the name suggests, this type of template supports working with macros;
- Template Word 97 - 2003 (*.dot): compatible with older versions of Word 1997 - 2003.
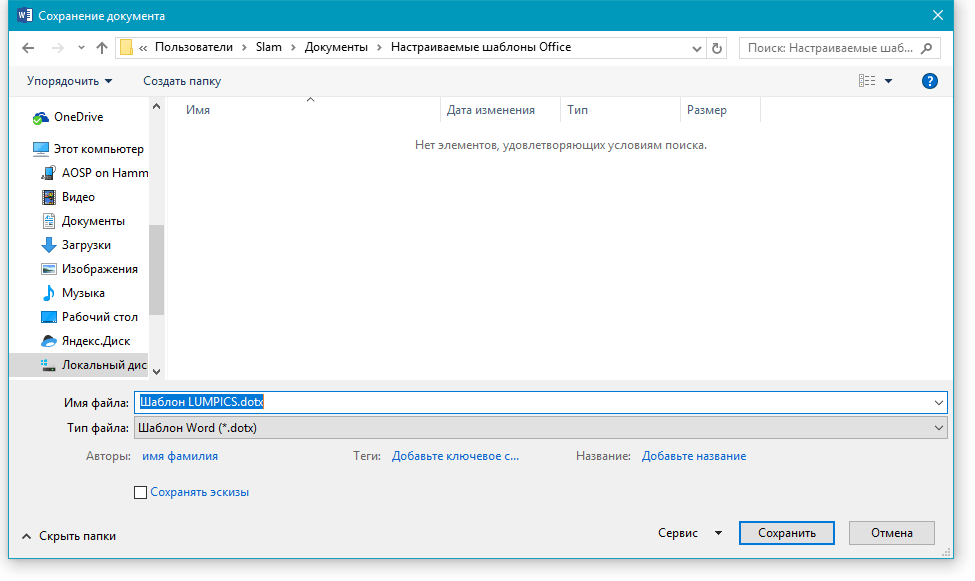
4. Set the file name, specify the path to save it and click "Save".
5. The file you created and configured will be saved as a template in the format you specified. Now you can close it.

Create a template from an existing document or a standard template
1. Open a blank MS Word document, go to the tab "File" and select "Create".
Note: IN latest versions In Word, when opening an empty document, the user is immediately offered a list of template layouts on the basis of which a future document can be created. If you want to access all templates, select when opening “New document”, and then follow the steps described in point 1.
2. Select the appropriate template in the section “Available templates”.

Note: In the latest versions of Word, you don’t need to select anything; a list of available templates appears immediately after you click the button "Create", directly above the templates there is a list of available categories.
3. Make the necessary changes to the document using our tips and instructions presented in the previous section of the article (Creating your own template).

Note: For different templates, text styles that are available by default and presented in the tab “Home” in the group “Styles”, may be different and noticeably different from those that you are used to seeing in a standard document.
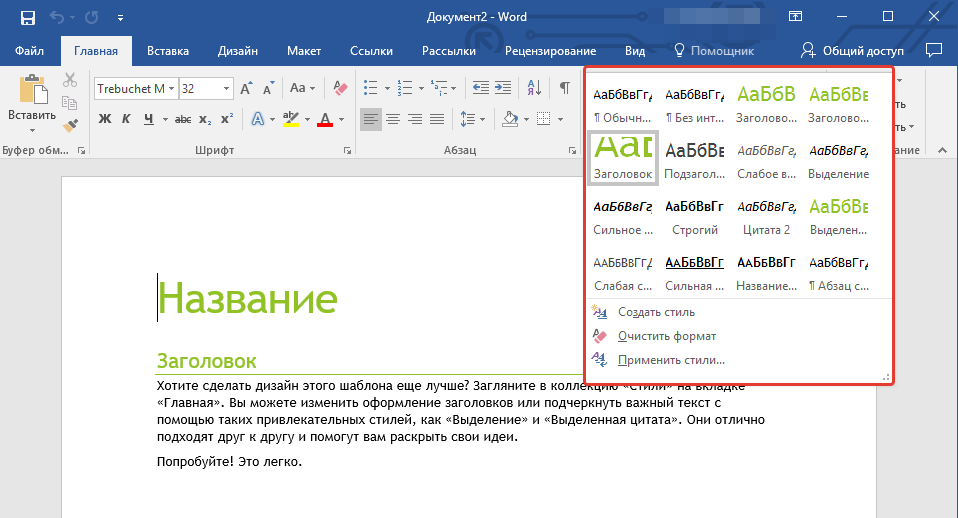
- Advice: Take advantage of the available styles to make your future template truly unique, unlike other documents. Of course, do this only if you are not limited by the document requirements.

4. After you make the necessary changes to the document, make all the settings that you consider necessary, save the file. To do this, click on the tab "File" and select “Save as”.
5. In section “File type” select the appropriate template type.

6. Set a name for the template, specify via "Conductor" ("Review") path to save it, click the button "Save".

7. The template you create based on the existing one will be saved along with any changes you made. This file can now be closed.
Adding Building Blocks to a Template
Building blocks are the reusable elements contained in a document, as well as those document components that are stored in a collection and available for use at any time. You can store and distribute building blocks using templates.
So, using standard blocks, you can create a report template that will contain cover letters two or more types. At the same time, creating a new report based on of this template, other users will be able to select any of the available types.
1. Create, save and close the template you created taking into account all the requirements. It is to this file that standard blocks will be added, which will later be available to other users of the template you created.
2. Open the template document to which you want to add building blocks.
3. Create the necessary building blocks, which will later be available to other users.
Note: When entering information in the dialog box “Creating a new building block” enter in the line “Save to” the name of the template to which they need to be added (this is the file that you created, saved and closed according to the first point this section articles).
The template you created, containing the building blocks, can now be shared with other users. The blocks themselves, saved with it, will be available in the specified collections.
Adding Content Controls to a Template
There are some situations where you want to give your template and all of its contents some flexibility. For example, a template might contain a drop-down list created by the author. For one reason or another, this list may not suit another user who happens to work with it.
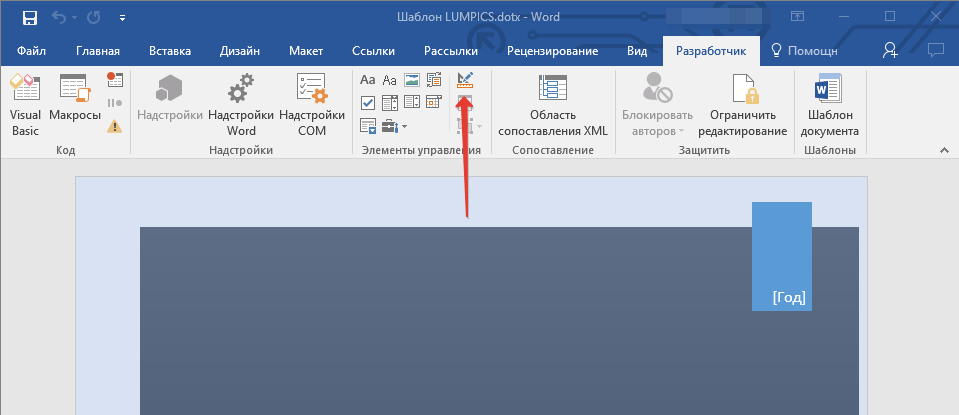
If such a template contains content controls, the second user will be able to adjust the list to suit themselves, leaving it unchanged in the template itself. To add content controls to your template, you must enable the tab “Developer” in MS Word.
1. Open the menu "File"(or "MS Office" in earlier versions of the program).

2. Open the section “Options” and select the item there “Customize the Ribbon”.
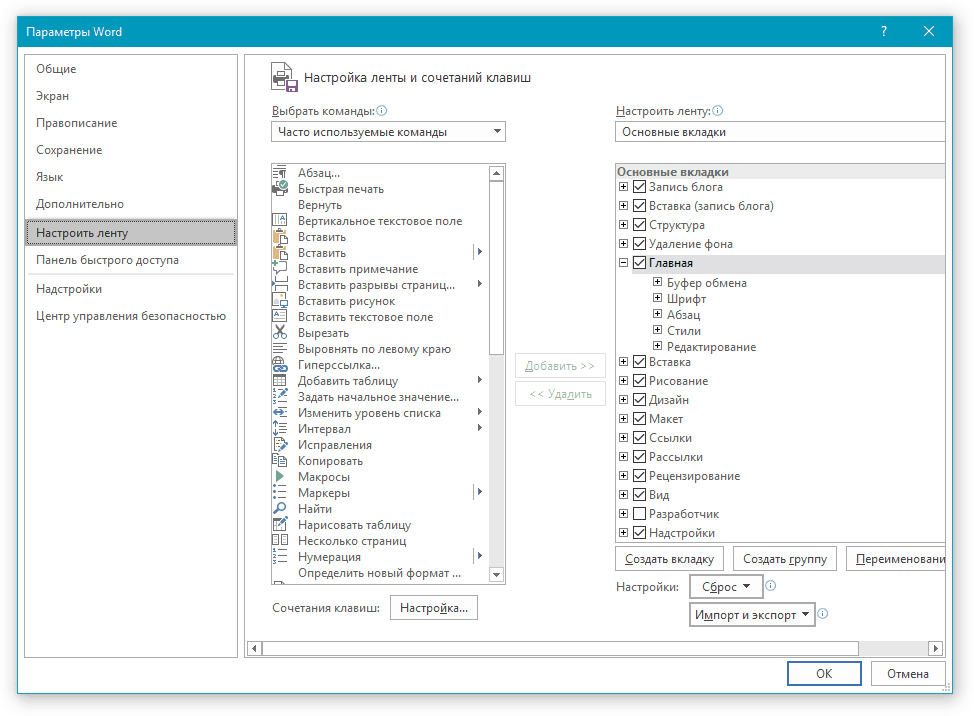
3. In the section “Main Tabs” check the box next to the item “Developer”. To close the window, click "OK".

4. Tab “Developer” will appear on the Word control panel.

Adding Content Controls
1. In the tab “Developer” click on the button “Design mode” located in the group “Controls”.
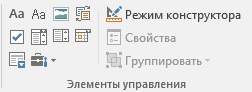
Paste into document necessary elements controls by selecting them from those presented in the group of the same name:
- Rich text;
- Plain text;
- Drawing;
- Collection of building blocks;
- Combo box;
- Dropdown list;
- Date selection;
- Checkbox;
- Repeating section.
Add explanatory text to a template
You can make the template more user-friendly by adding explanatory text to the document. If necessary, the default explanatory text can always be changed in the content control. To set the default explanatory text for users who will use the template, follow these steps:
1. Turn on “Design mode”(tab “Developer”, group “Controls”).
2. Click on the content control where you want to add or change explanatory text.
Note: Explanatory text is in small blocks by default. If “Design mode” disabled, these blocks are not displayed.
3. Change, format the alt text.
4. Disable “Design mode” by pressing this button on the control panel again.
5. Explanatory text will be saved for the current template.

This is where we end, from this article you learned about what templates are in Microsoft Word, how to create and edit them, as well as everything that you can do with them. This is really useful feature a program that greatly simplifies working with it, especially if not one, but several users are working on documents at once, not to mention large companies.
We are glad that we were able to help you solve the problem.